0


So I thought I would share what I've been spending around 1 day a week average working on since the summer: Building my own garage/workshop. I'll be adding to this thread as I make more progress.
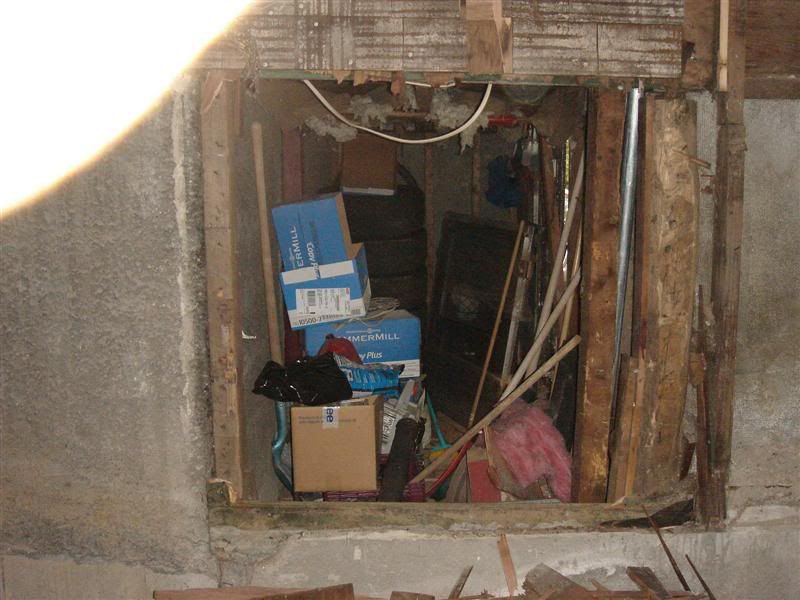
My folks' office building has some parts of the basement that are separate due to the building having had a couple additions over its lifetime. One portion is about 15x18, and consists of a dirt floor, and very old plaster covering the walls and ceiling (the type of plaster with a mesh screen nailed up and the plaster attached to the screen). It's been full of a bunch of useless crap we have to shove in there about 7-8 years ago in a hurry (long story) and haven't done anything with since. Also, through a small wall there is another small portion separated from the main basement that is about 5x15 which also has a dirt floor and had crap in it as well.
Upon starting the project I decided it would be well worth it to break down the wall and connect the two sections into one workshop... the smaller room will end up with lots of shelving mounted to the walls. Due to the age of it all, I decided to frame new walls inside the room in most places, in order to be able to insulate easily, hang drywall, and mount light fixtures, outlets, etc. There are some walls in the smaller room up which I will just mount insulation and sheetrock directly, though.
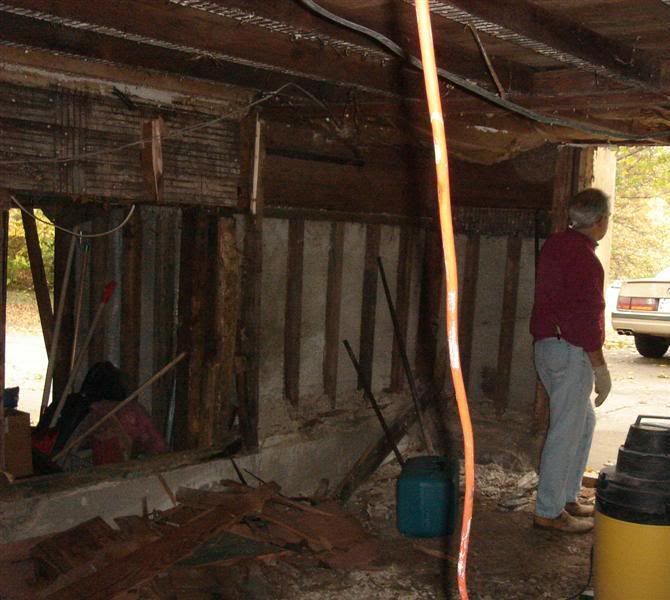
Just getting all the stuff out and making all the dump runs, as well as ripping out all of the old plaster and insulation took me the first few months (only one day a week, roughly).
Zip-Tie Alley Racing
LRRS/CCS #103
PPS | Dunlop | Boston Moto | Woodcraft & Armour Bodies | 35 Motorsports | Pit Bull | K&N
So, here is what I started with:
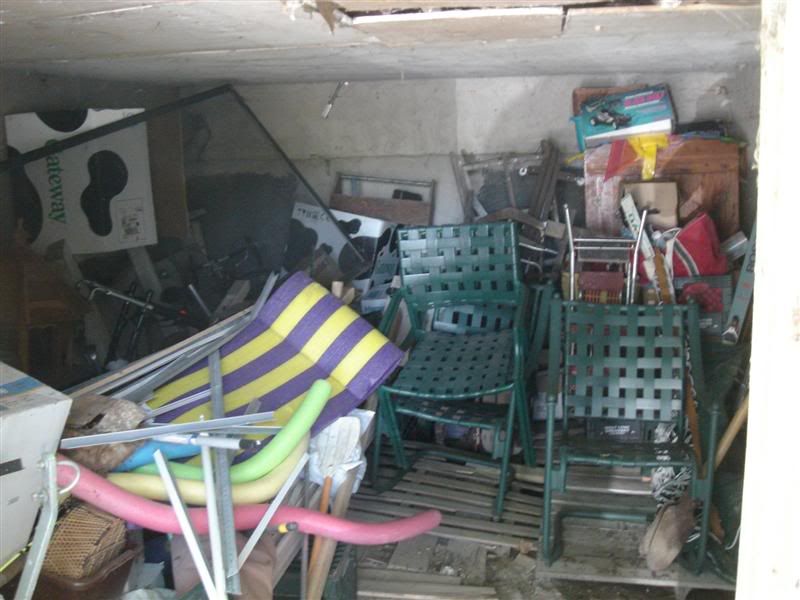
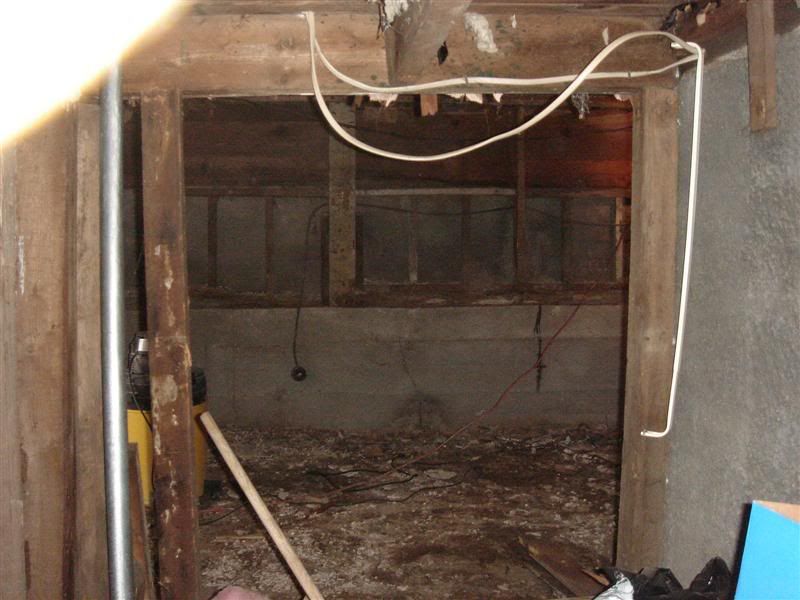
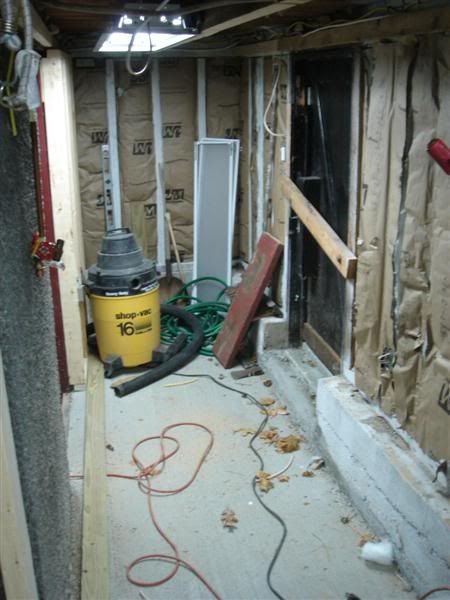
Main room full of crap:
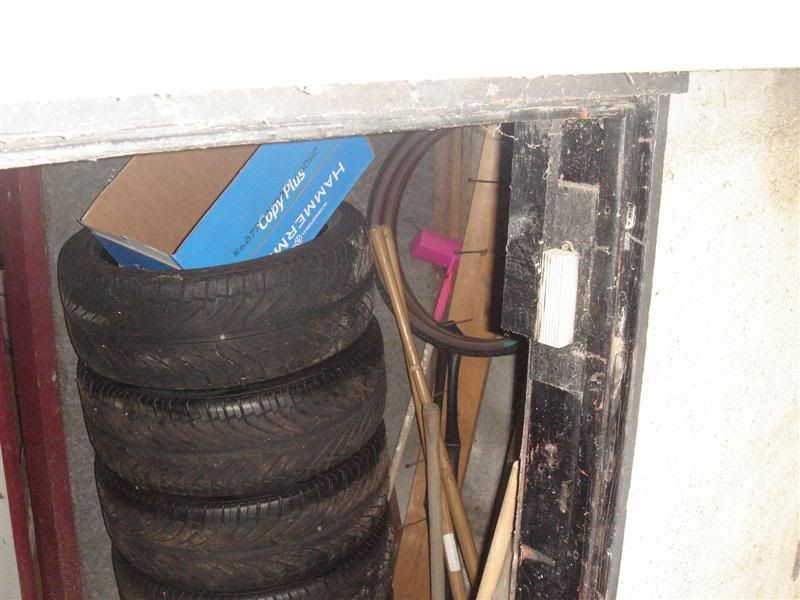
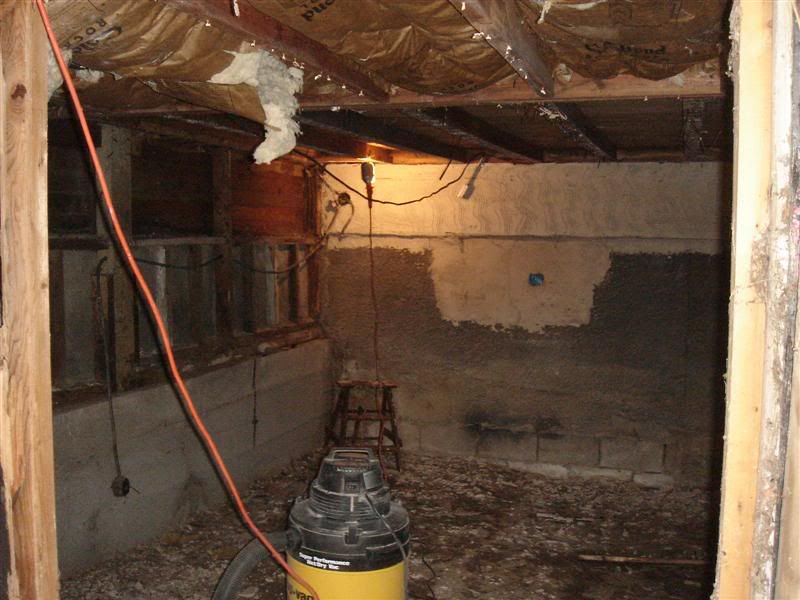
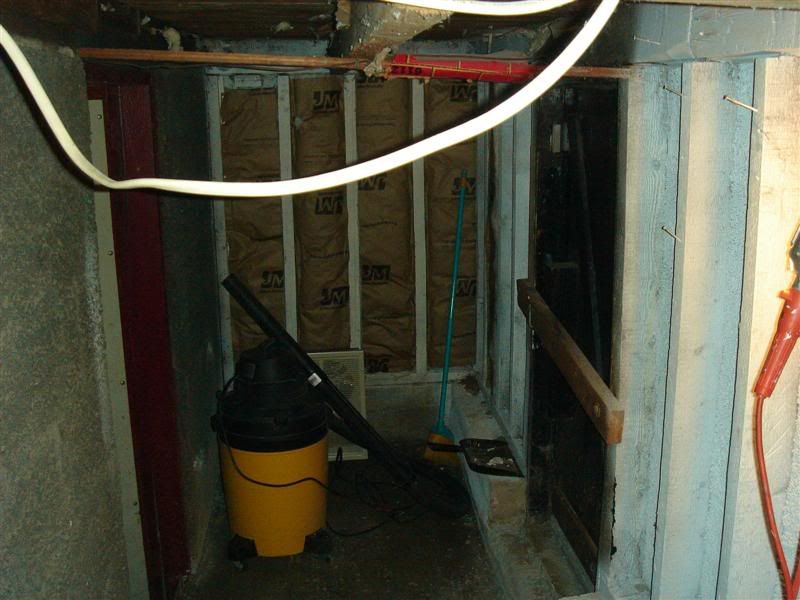
Here is part of the smaller room:
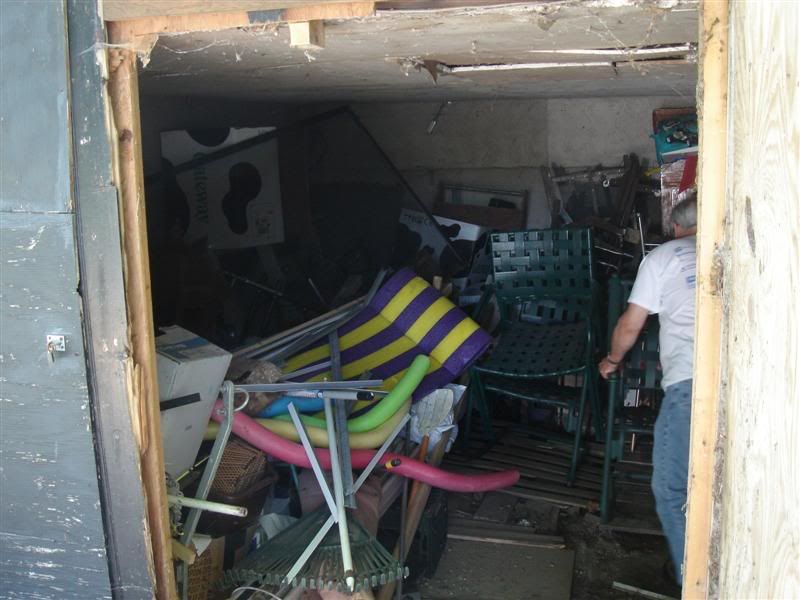
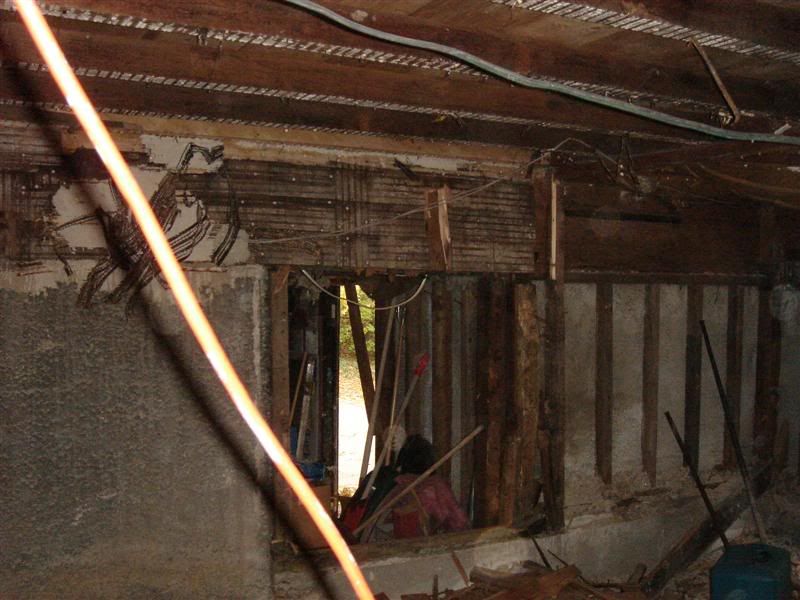
After I knocked down the wall between the two and cleared out the main room, here is a view looking from the main room into the smaller room:
Zip-Tie Alley Racing
LRRS/CCS #103
PPS | Dunlop | Boston Moto | Woodcraft & Armour Bodies | 35 Motorsports | Pit Bull | K&N
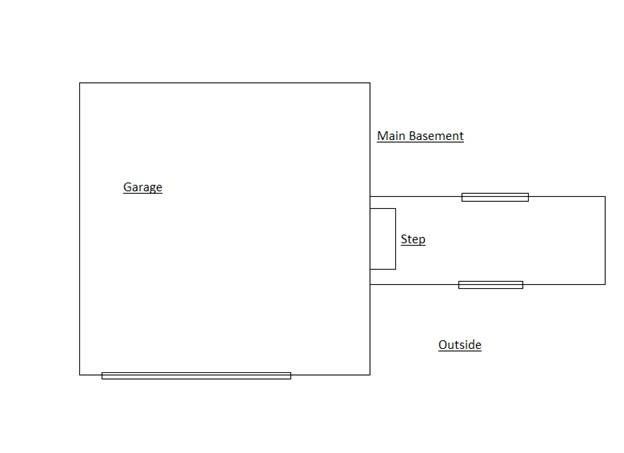
So, essentially, here is a schematic of the space I will be working with:
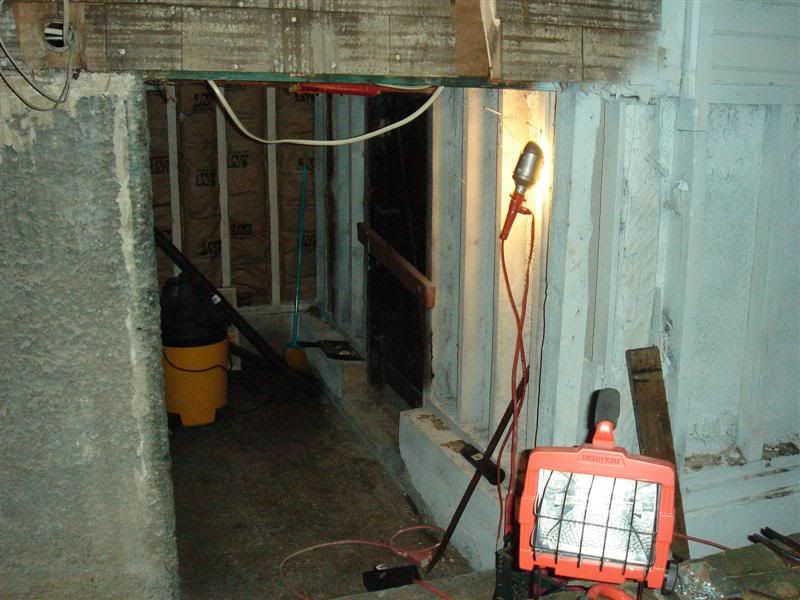
Here is the whole place stripped out,dirt floor, ready for concrete:
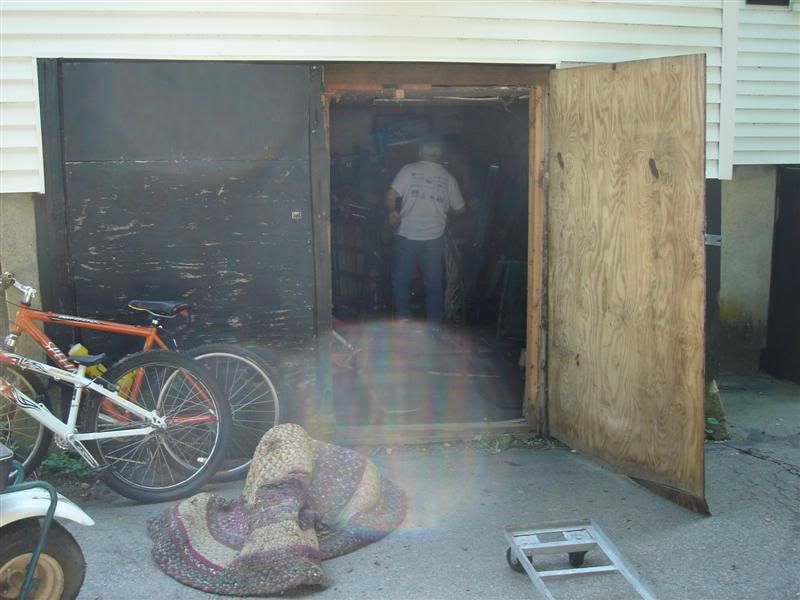
In this one you can see the main garage door as well as the smaller door in the small room.
Zip-Tie Alley Racing
LRRS/CCS #103
PPS | Dunlop | Boston Moto | Woodcraft & Armour Bodies | 35 Motorsports | Pit Bull | K&N
The concrete needed not only to be laid inside the building in the two rooms, but there are severe drainage issues right outside the building, so there is now also a concrete 'apron' that runs around the whole back of the building and up the side a little bit. This makes sure all the rain goes away from the building. I don't have pics of the outside right now, I'll add some later. Also, all of the walls that border the outside world, I sprayed using a paint sprayer with a heavy duty sealing primer called 'Kilz'... seals in moisture, etc. Also, I caulked any cracks or holes both on the inside and outside.
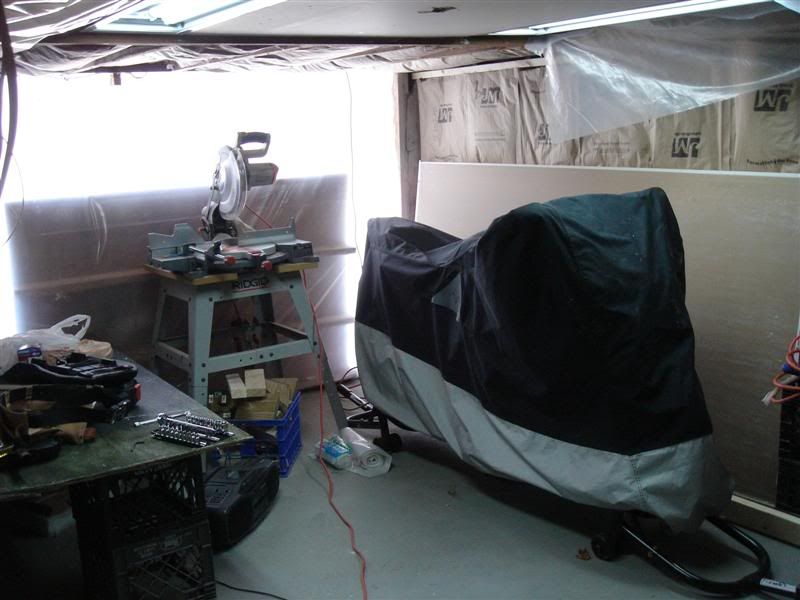
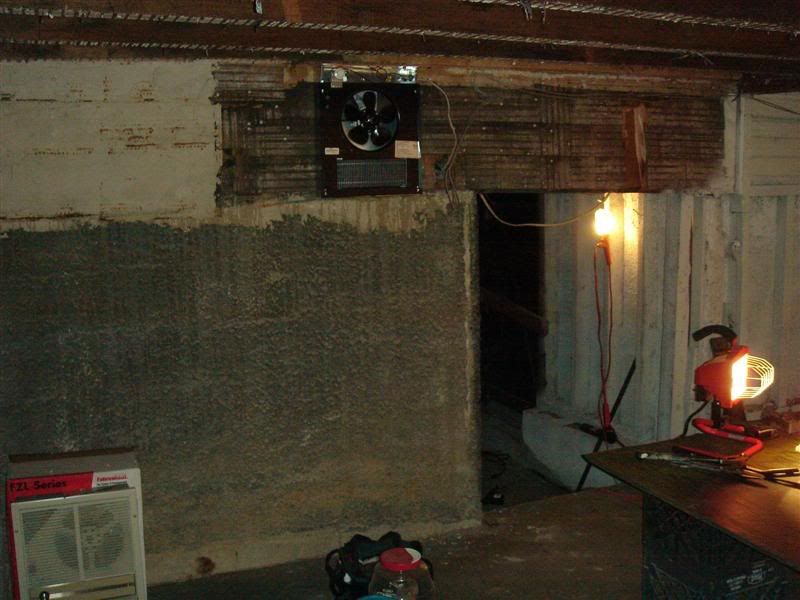
Here's some shots with the floor in, walls sealed,(I've also insulated the walls in the small room that I won't be building another wall inside of) ready to start getting some real work done:
Zip-Tie Alley Racing
LRRS/CCS #103
PPS | Dunlop | Boston Moto | Woodcraft & Armour Bodies | 35 Motorsports | Pit Bull | K&N
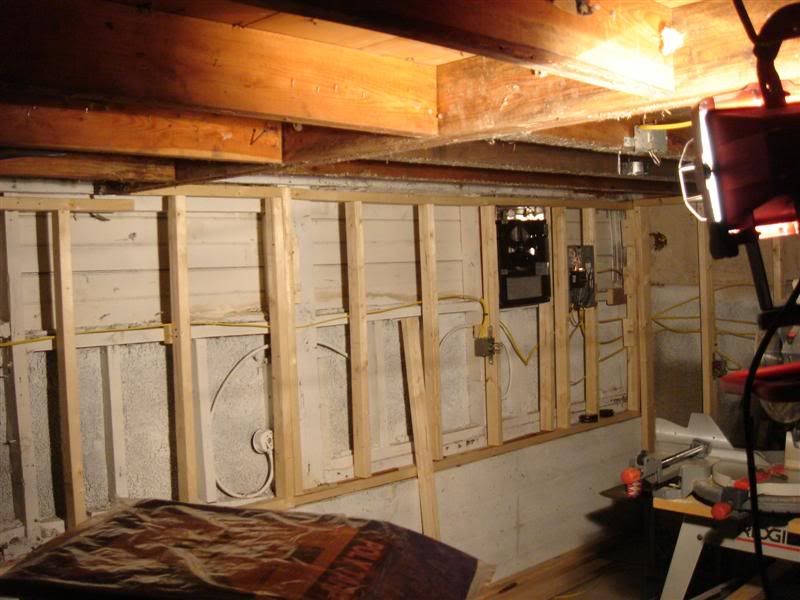
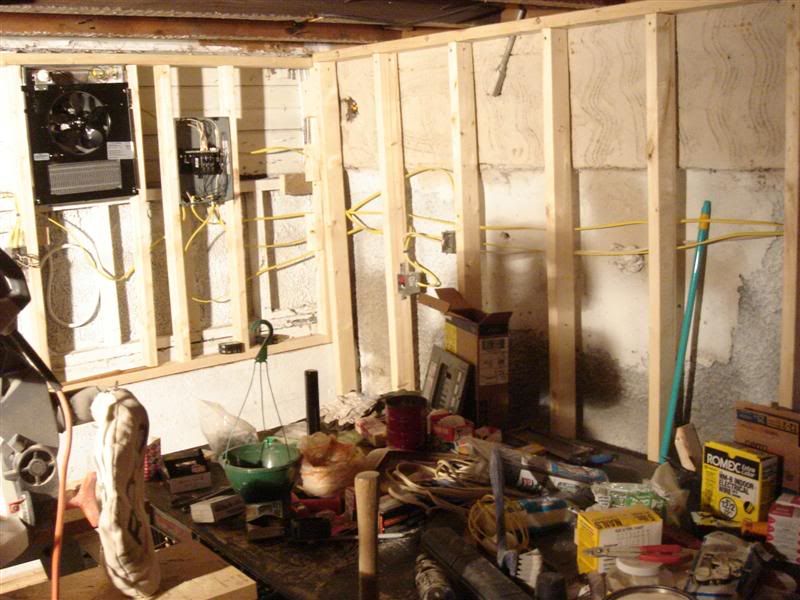
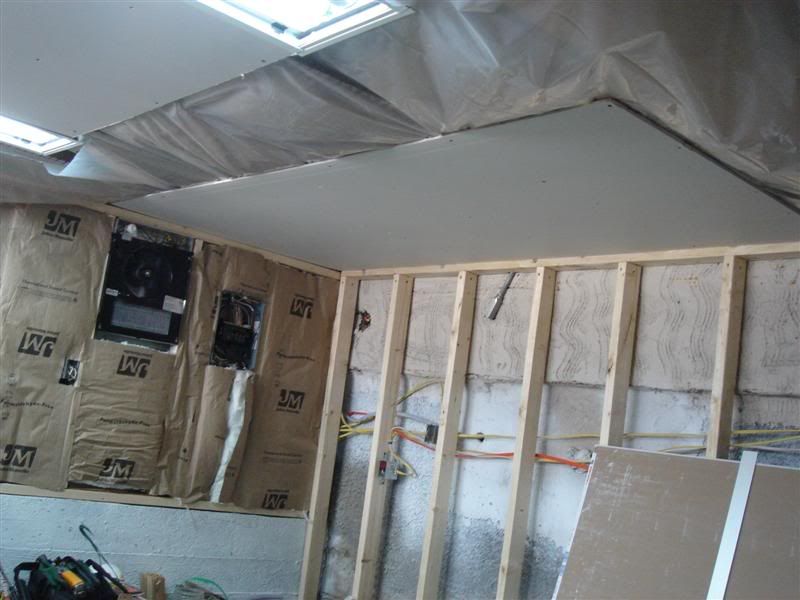
I framed walls on most of the remaining walls. There are a couple where I will use the existing frame. To attach the bottom 2x4 to the floors, I used one of those powder-actuated nailers that use little bullets and you hit them with a hammer. I've used them before, they work great, made by Remington. After that it's just standard pain in the ass wall framing.
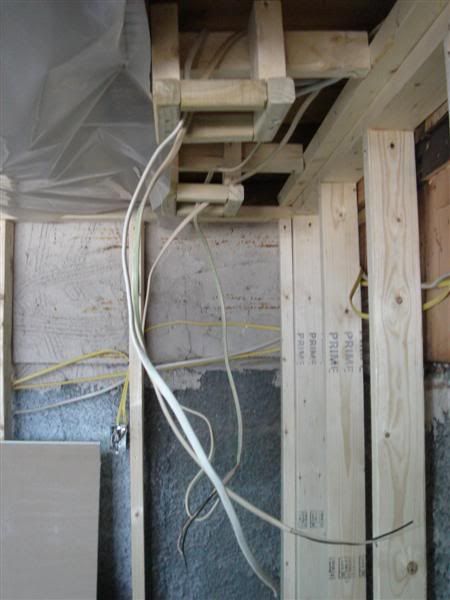
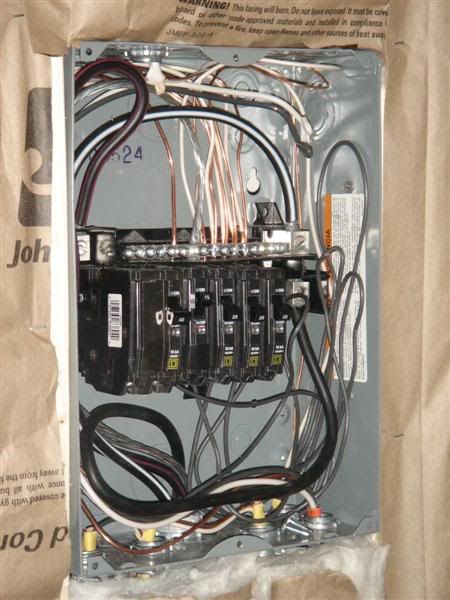
Then, I ran all of my wires. Due to anticipated high amperage, I used 4 gauge wire (for this particular wire I used aluminum because copper is so damn expensive right now) and ran a line from the takeoff lugs on the building's main panel back to my garage, and mounted a subpanel. I also used an existing wire to connect a fan-forced heater and mounted it in the framing... nice and toasty in there now. I ran all the wires for three big fluorescent light fixtures with a 3 way switch in two places, 4 small spotlights (for above where I plan to build a workbench and where I plan to have my big roller tool chests) controlled by a switch near where the workbench will be, 9 normal outlets, and 1 line for a 220V wire for when I get a compressor, hopefully not too far in the future. This is all managed by a 15 amp breaker for all the lights, three 20 amp breakers for all the outlets, and a 40 amp breaker for the 220V line.
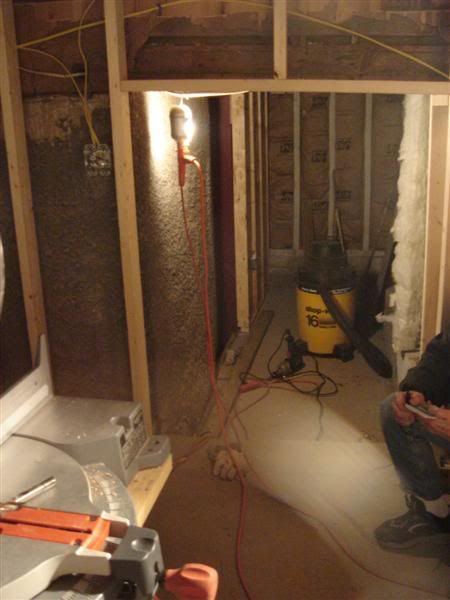
Here is some pictures with most of the walls done being framed and most of the wiring done.
Zip-Tie Alley Racing
LRRS/CCS #103
PPS | Dunlop | Boston Moto | Woodcraft & Armour Bodies | 35 Motorsports | Pit Bull | K&N
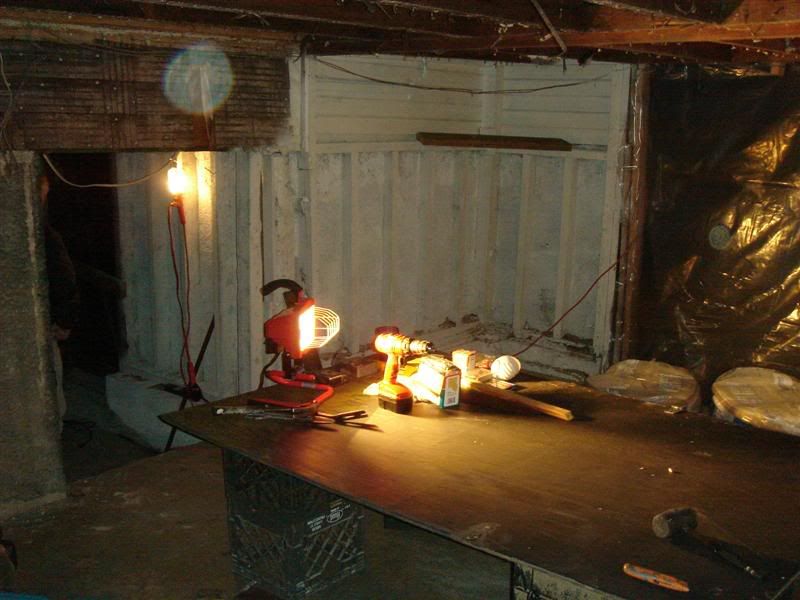
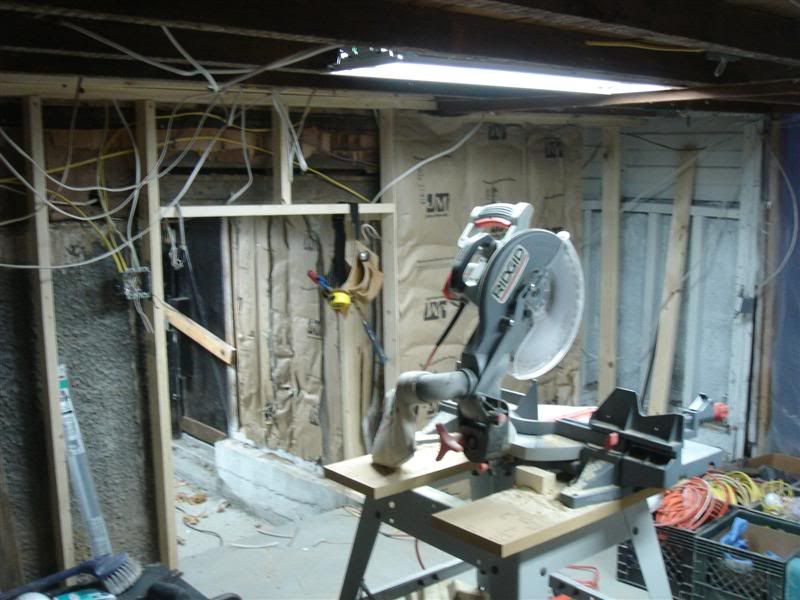
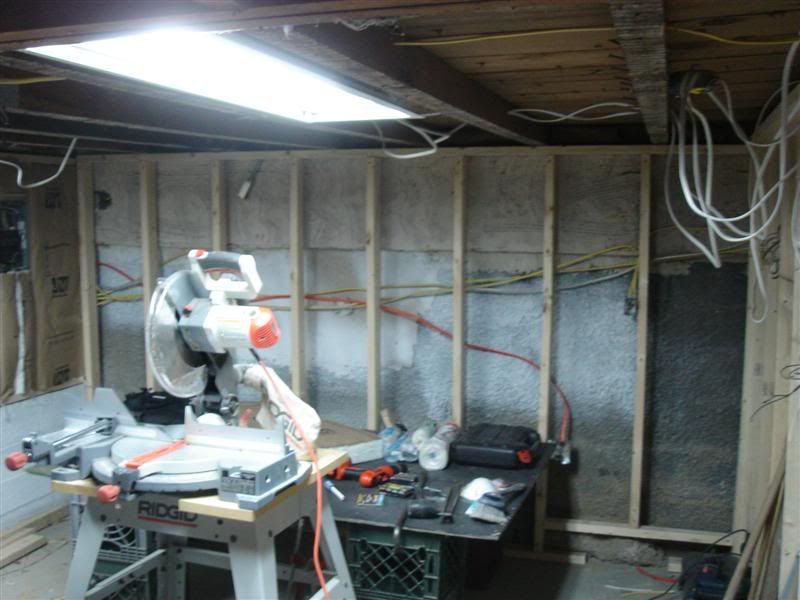
Today I got some bulbs and turned on the breaker for the fluorescent lights so I can stop working with those damn spot/work lights. I finished a couple other little wiring things and insulated the two walls that are up that border the outside. Here's some pics with the lights on.
I plan to run a couple speaker wire outlets and the accompanying wires on the back wall because I plan to bring in my stereo and speakers on shelves there. After a couple more little wiring and insulation things, it will be time to start the drywall for all the walls and the ceiling. Really starting to come together.
Zip-Tie Alley Racing
LRRS/CCS #103
PPS | Dunlop | Boston Moto | Woodcraft & Armour Bodies | 35 Motorsports | Pit Bull | K&N
leave space for the 50" hi-def
Wow, nice work so far! I envy people with construction abilities, it's something I've never had much experience with. I suppose once I own a house I'll get into it more...
Keep those pics coming!
Looks great,
I did notice a couple wiring mistakes in your subpanel. You should to remove all those ground wires and install a separate groundbar/terminal strip.You should be able to pick one up at the Depot,you shouldn't have continuity between your grounds and neutrals.
looking good, wish i had some workspace...
Tuono
how much would you like for those pool noodles?
It's coming along great, I wish I had a secret lair I could build into a garage.
Thanks for the compliments, guys. I'm beginning to be pleased with it now that it's really coming together. Once you get drywall up, it always looks a lot more complete; it's just a visual thing. I'm pretty much ready to start on that now.
For this particular setup, that's not needed, I don't think. I checked with a buddy of mine who's a master electrician, and he said it's cool the way it is. It is dependent on what kind of panel I'm going back to in the main basement: I'm running off of the takeoff lugs of one of the larger panels back in the main basement, and my subpanel is wired up with no main breaker. In the way my subpanel is now setup, if I ever lose the ground, the neutral is there. It's safe.Originally Posted by KevinB

Also, I turned the lights on and they work, so hey
I'm not great with electrical stuff, but I do alright. I think the way it is now is fine.
You can have them for free!!! You just need to go to my local dump and find them
Zip-Tie Alley Racing
LRRS/CCS #103
PPS | Dunlop | Boston Moto | Woodcraft & Armour Bodies | 35 Motorsports | Pit Bull | K&N
I'm a Master Electrician, its wrong.
Mounting And Wiring A New Sub-Panel - Old House Electrical Update
Grounding and bonding of the sub-panel
At the sub-panel there must be no connection between the neutral bus bar and the equipment ground bus bar or the neutral bus bar and the sheet metal of the breaker box. You may need to purchase an additional bus bar for the equipment ground since many panels, especially those that come with a main breaker, do not come equipped with one. If the panel comes with a bonding screw or bonding strap, do not install it to the neutral. Depending on the brand of panel, you may need it to connect the ground bus to the sheet metal enclosure.
Last edited by KevinB; 12-03-07 at 07:33 PM.
Good work Chris...
But man, you know the times are tough when we take
to discussing a basement conversion and electrical sub panels!
We all better hit the slopes soon or the sun better return to
its closer orbit so we can go outside and ride!
2008 Honda CBR 600RR
Damn Chris...looks like you have had yer hands full! Looking good. The hard work will pay off! Great job man!
If all else fails, Lean more....

So what overcurrent device is protecting the sub panel and the #4 cable feeding it?I'm running off of the takeoff lugs of one of the larger panels back in the main basement, and my subpanel is wired up with no main breaker.
'04 600RR
Thanks man... and yeah, they are starting to get some snow up there... it would be nice to get up there since I was only able to go 4 or 5 times last snowboarding season.
Thanks, buddy.
The more I think about it, you two guys are right. I usually trust my buddy who's an electrician, but apparently he cuts some corners.
I bought a 60 amp double pole breaker to cover the subpanel, and a ground bus bar to separate the neutrals and grounds.
Everything works as it is now, but those are safety precautions, and you guys are right that I should have them in place. I guess I should go and check over some of the other work he did on my folks' building... haha.
Zip-Tie Alley Racing
LRRS/CCS #103
PPS | Dunlop | Boston Moto | Woodcraft & Armour Bodies | 35 Motorsports | Pit Bull | K&N
Sorry, this is wrong for a sub panel............Your friend might be an electrician, but he's got some "splaining" to do!
You need a seperate bus bar for the grounds....period!
But the rest looks like it's coming along nicely.........
Roy B
Yankee Beemers, Prez
Dartmouth, Ma
2007 Suzuki V-Strom (ABS)
2007 BMW X Challenge (ABS)
1987 BMW K100RS M-Sport
2004 Honda VFR (ABS)
2001 Moto Guzzi V-11 Sport
Psst.... Look at my post directly above yours....
And thanks... it is coming along pretty well... it's just tough because I can't get out there to work on it as frequently as I'd like. Hopefully I'll get some more done this weekend and take some nice pics.
Zip-Tie Alley Racing
LRRS/CCS #103
PPS | Dunlop | Boston Moto | Woodcraft & Armour Bodies | 35 Motorsports | Pit Bull | K&N
A little update.
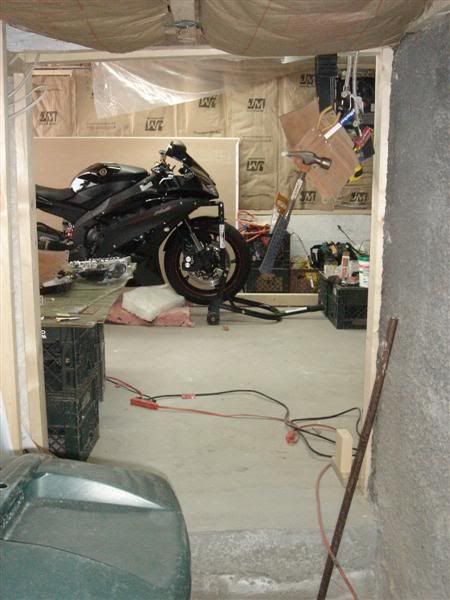
The bike is in there now on a tender, because of the snow. Fits in nicely, I will have PLENTY of space to work on it. Only problem is I noticed there was some oil on the ground underneath the bike, and it didn't look like it was coming from the breather tubes. I didn't have time to look into it, so now it's bugging me quite a bit, I'm worried.
All of the insulation is done. I've JUST started drywalling. Lots of work left to do there.
Because the little spot lights I am putting above my workbench and tool chest are a little too long to fit in the rafters, I had to box them in. I built little boxes and hung two of them, I still have to hang the other two.
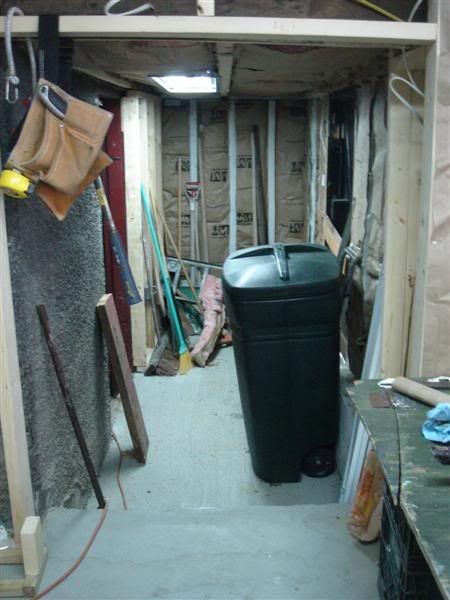
Here's a random shot of the little side room.
Left to do:
- Hang boxes and run wires for speakers (have parts already)
- Hang other two small light boxes
- Modify the subpanel (add a 60amp main breaker and ground bus bar... have the parts)
- Build and hang doors
- Finish putting up plastic sheeting
- Drywall hanging, mudding, sanding
- Paint
- Install all outlets, switches, and faceplates (after paint, obviously)
- Put down epoxy floor coating (medium gray with black, red, and white paint chips)
- Crack a beer and admire the work
Zip-Tie Alley Racing
LRRS/CCS #103
PPS | Dunlop | Boston Moto | Woodcraft & Armour Bodies | 35 Motorsports | Pit Bull | K&N
wanna build me one now.. il supply the beers and pizza
I'd have to say, although it's small, it seems to work perfectly for your purpose... I fit in there fine, so once I buy my new place wanna come and build a replica for me?? Course, no one else would be able to work on my stuff, but I think that is half the appeal... o and thanks for not realizing who i was(or did you???)
Supply beers, pizza, and money: you've got yourself a deal.
You gotta pay me, but sure
And yeah, I realized who you were as soon as you told me that you had dropped your gixxer...
Zip-Tie Alley Racing
LRRS/CCS #103
PPS | Dunlop | Boston Moto | Woodcraft & Armour Bodies | 35 Motorsports | Pit Bull | K&N
haha very funny.
Looks toight! Toight like a tiger!!
Nice work meng!
KB
 Posting Permissions

 Reply With Quote