0


This may have to be an October project.Originally Posted by jasnmar

And don't take it to NYST when finished.
yeah, i wouldn't paint at anything below 65 degrees, and that is cutting it close
Destroy, Erase, Improve
Per google, running the propane heater is a huge no-no. Sounds like I need to do it in the next few weeks or wait til Spring.
yes, open flames and paint fumes do not mix very well
Destroy, Erase, Improve
What could possibly go wrong? I say you find out.
I once burnt my beard off while cooking some premade hamburgers over the grill. I imagine it would be something like that, except over your whole body
Destroy, Erase, Improve
Pete
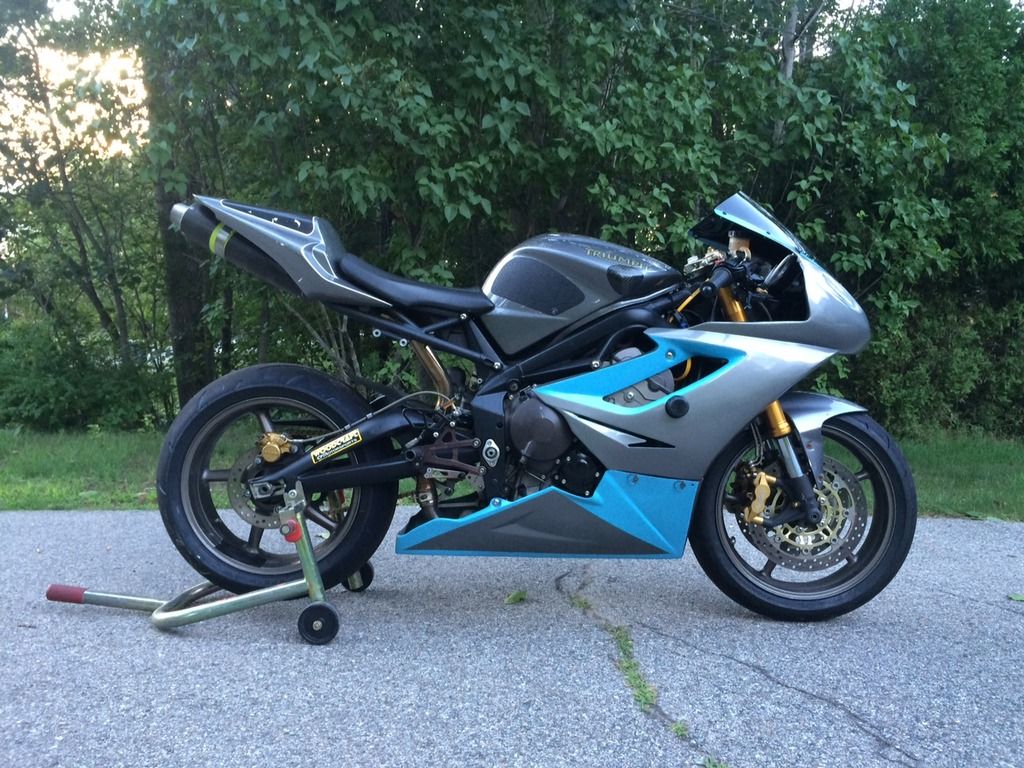
If you saw my bike at the 9/22 track day at Thompson, before my ingition issues happened, thats a rattle can paint job. I have actually done that one twice, since the bike was crashed this season as well. Everyone who has talked about prep is spot on, the second time around I spent more time on prep and it came out way better than the first time.
Don't spill gas on the rattle can clear coat, it does some not so great things to all the hard work that gets put into the paint job.
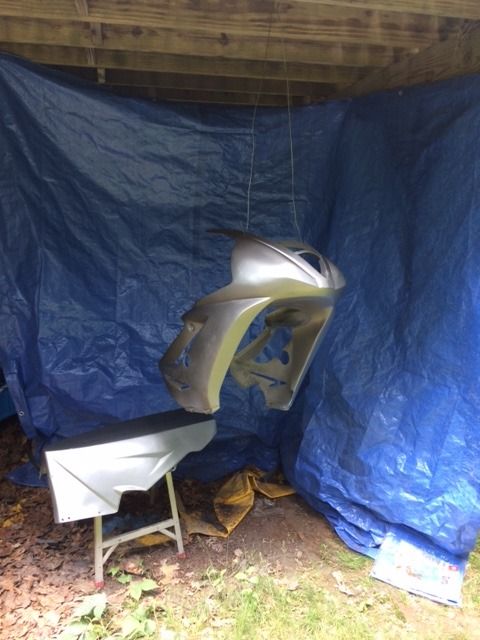
If you can put the parts in direct sunlight so they can bake a bit, the paint gets a bit harder and it less likly to come off if you put anything on it.
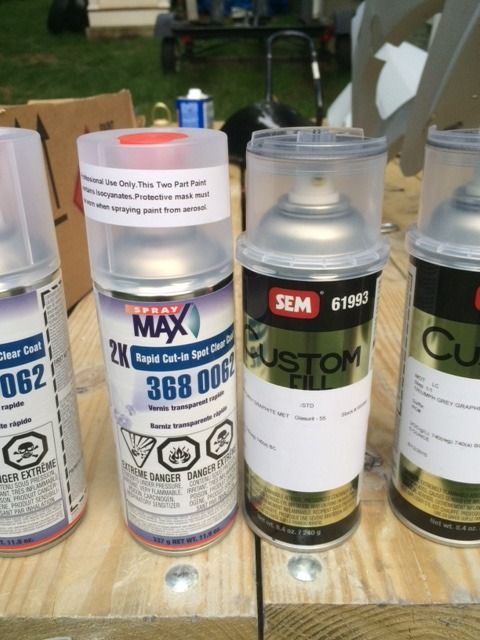
Use masking tape designed for automotive paints. Ditto paper -- don't just use newspaper.
Tape was designed for automotive paints. At least that's what the label said. Also said it would do corners well.. it did not. Still had to trim my edges and details, could not form them by hand just using the tape.
Although I don't use automotive paint. I use tractor paint.
Powerblock TV is a good show for learning painting tips and tricks, Kevin Tetz is awesome. They recently did a show where they painted a Silverado themselves and went over all the prep stuff. Let me see if I can dig it up.
Truck Tech - Senior Silverado: Perfect Paint Prep
I'm planning on painting the El Camino myself. It should be challenging..!
Last edited by number9; 09-29-14 at 07:21 PM.
Bump because I'm actually going to try to do this soon. I know I'm not supposed to paint below 60 degrees. Is this more about the initial application of the paint, or more about the time to cure? Reason I ask- I have a small shed that would be a good candidate for turning into a temporary paint booth. It would be easy for me to stick a heater in the shed prior to painting, but I don't want to run the heater after painting. So it will likely start at a nice temperature, then drop below 60 overnight. Thoughts?
Thoughts? My thought is that you worry too much. You make me look laid back, which is just weird.
It depends on the type of paint used but it'll affect the curing. For example, if you're using a basecoat/clearcoat system, they will sell a variety of hardeners to be used in different temperature ranges.
I'm using a black rustoleum/white rustoleum system. I should probably just paint the damn thing. Going to get fancy with a 2K clear on the tank though.
I'm not sure how much humidity plays a factor but I stripped & painted a frame a few years back during a rainy season and I feel like it didn't set as well as should have. Also emphasized the importance of prep, even after several good scrubs the stripper I used left a light film that really effed up the base coat for me. Tons of soap and water, lots of drying and good prep, lots of sun & ventilation go a long way..
NFRIA
I would look into wrapping it
The calculus of hate
It is not that I should win it is that you should lose
It is not that I succeed it is that you fail
It is not that I should live it is that you should die
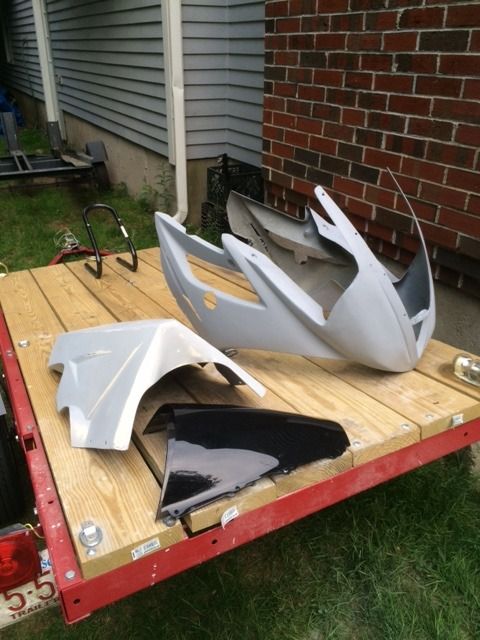
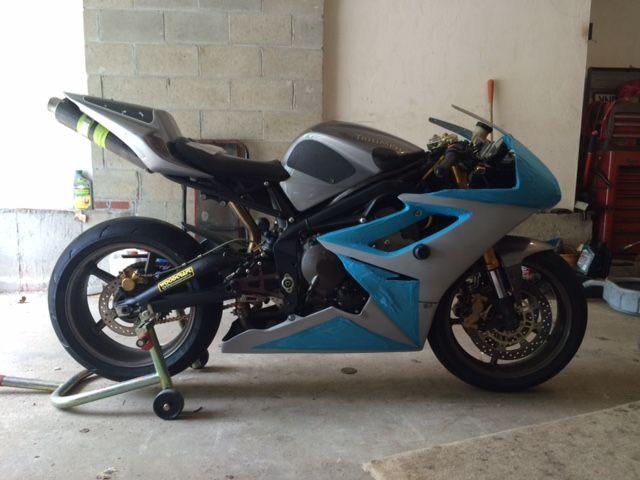
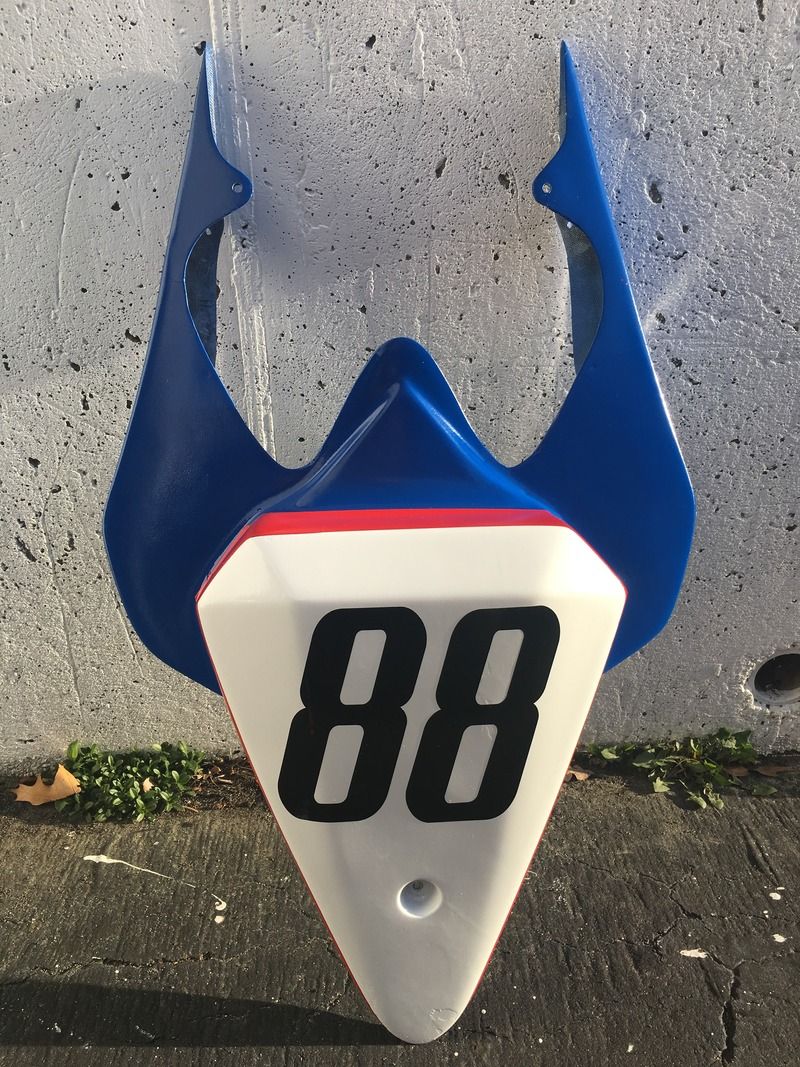
Weather this weekend should be fine. Out of laziness, here is a quote from my build thread that I painted myself with quality color matched automotive paint and clear put into spray cans. The blue is just a wal-mart spray can. I made a booth under my dads deck. Sprayed everything down with a hose an hour or so before. Remember, any defects will really pop out once you clear. My advice: if there is anything you are not satisfied with when priming, wet sand it, dry, prime again. When you think your primer is good. Wet-sand everything with 400, hit it again with another layer or primer. Wet stand that with 6-800. Then spray your base. Inspect the base in-between EVERY coat. Any defect you see, wet sand with 800-1000 then hit it again with another layer. If you keep on adding layers expecting it to fix a problem, it will only exaggerate it. You need to wet-sand it out. Repeat this process until you are happy. You can do this little bits and pieces at a time and do not need to respray the entire panels every time. This is not how you would paint a car, but it is how you can paint race bodywork. Once you are satisfied, you need to do one final coat over the entire panel (or at least a big portion of it) to help blend any differences in paint thickness that may have popped up. Any parts that are starting to show orange peel will only get worse once you clear. Once satisfied, then you clear and are done.
I did the entire nose, upper, and lower with 2 cans. I would buy 3 cans to be safe if I did it again or had to do the tail.
Last edited by JettaJayGLS; 04-15-16 at 11:14 AM.
A man of many names...Jay, Gennaro, Gerry, etc.
If I can come anywhere close to that I will be happy. Any tips on masking? When did you apply the first layer of masking, and when did you remove it?
Edit- that was in response to Sav, valid for Jay too
Last edited by Petorius; 04-15-16 at 08:31 AM.
I'm gonna say 4 hours to be safe. My bet is that 2 would be fine. Be sure to use good quality automotive paint tape. This is weather dependent too. Humidity is bad.
I'll say, that fiberglass absorbs paint like a champ, and if you sand your primer correctly, that will help with adhesion too.
A man of many names...Jay, Gennaro, Gerry, etc.
Can said 1 hour to handle. I waited 24 in 70 degrees very low humidity to be safe.
As jay said do not cheap out on tape. I think the tape I used was more expensive than a can of paint. 3M all day.
Also used 3M sand paper.
240-320 for the really bad parts, 400 for everything that was smooth, up to 1500. I never used 2000 or higher and I don't buff or wax my fairings on the race bike.
I can't stress enough letting the paint dry enough. And as I found out the hard way there is difference even within the same brand on different colors. Example: the white dried perfect almost within 2 hours. The blue a little over. The red took 8+ hours and it feels like plastic on the touch.
Today numbers went on too. Tease from the tail and announcement of the new number
 Posting Permissions

 Reply With Quote