


3


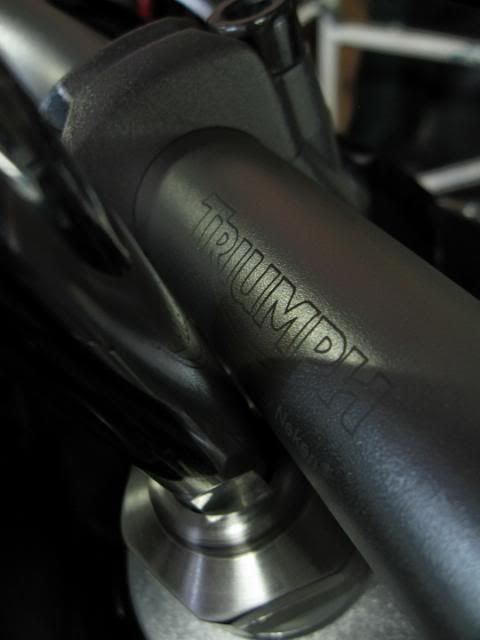
I have a Triumph Tiger 800 ABS roadie and they're known for getting loose on the headset bearing nut. I have the factory service manual and instructions for re-torqueing the nut include "Step 1: Remove handlebars."
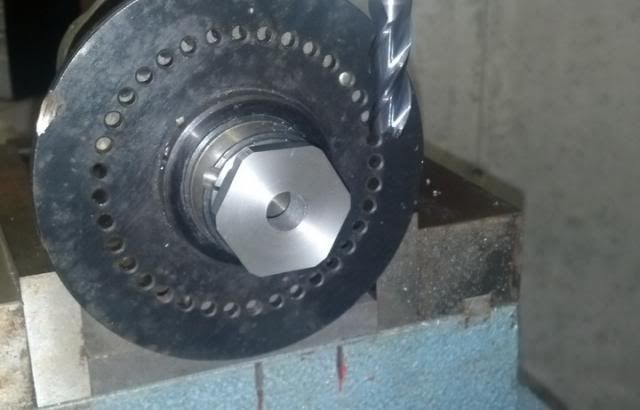
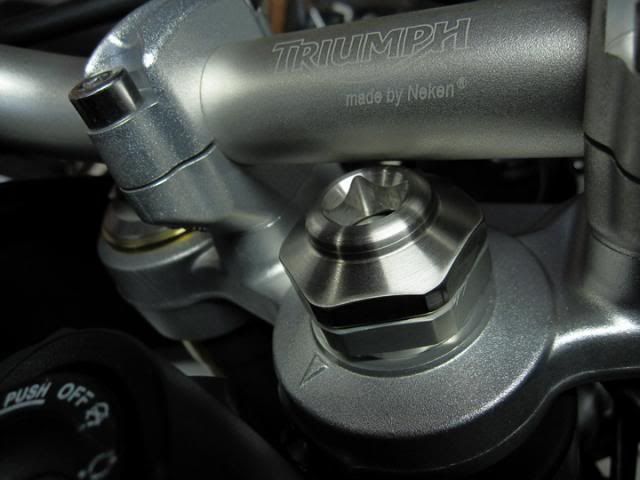
The nut is not directly under the handlebars, but offset enough that I thought if I had a tool that drove the nut via the six pin holes rather than marring the finish of hex on the nut with big sockets or open end wrenches, I might also be able to drive it with a 1/2" or 3/8" square drive and do so without touching the bars. Here's a photo, it's kind of tight in there.
I did take some measurements with a caliper, but it's hard to judge just how much space I'd have with a tool needing strength and holding pins. Off to the shop to see what I had for stock, a 3/4" long piece of Ø 1-5/8" 303 stainless steel was all I had in something strong yet non corrosive. I whipped up this blank on the lathe.
The only means I had to mill the 38mm hex was to hold onto that short 1" diameter on the back. It's held in a 5C collet that's in what is known as a "spindexer". Six flats milled in a couple minutes with a solid carbide 3-flute end mill.
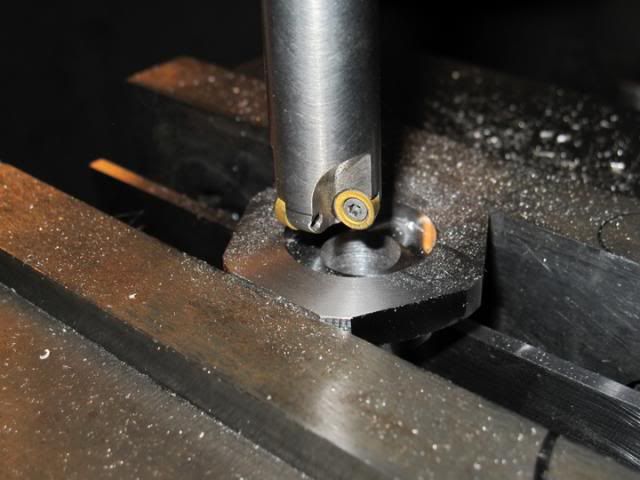
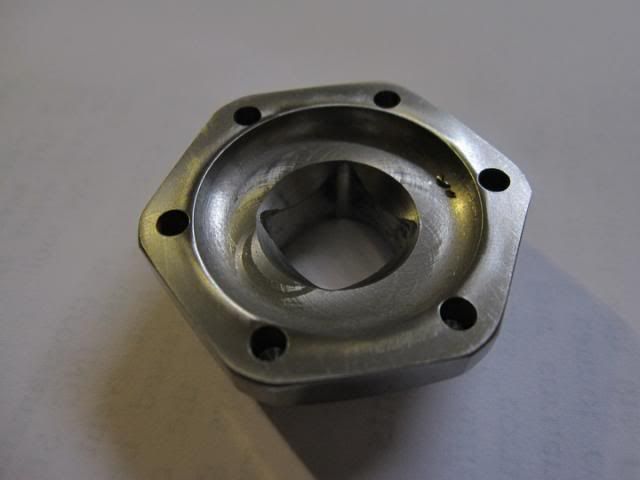
Now remembering that the aluminum nut on the bike has a crown it and the 3.55mm holes are very close to it, this was going to be the "precision machined" portion of this program. I first used a 3/8" 4-flute carbide end mill to rough out the recess. I didn't want the recess to be deep out to the full diameter, as it might interfere with the 30º clearance angle on the back of the tool. In this photo you can see the roughed out recess and the "bull nose" 3-insert cutter to be used.
Now here's that cutter in action, a roughing pass followed by a .010" finish pass. The machine is only 2-axis CNC, so that's why there's a dwell. I have to position the depth by hand.
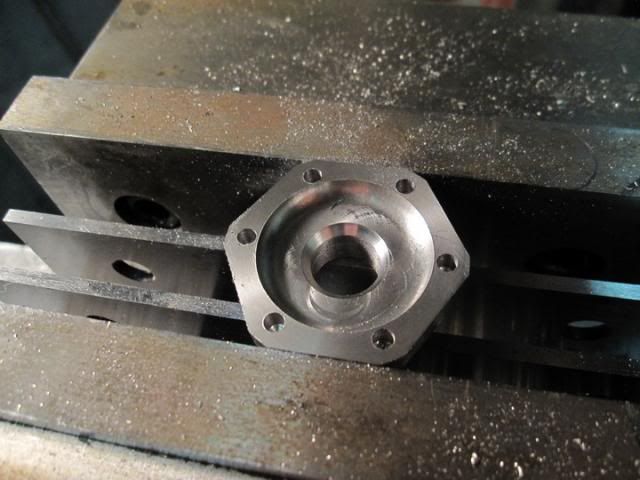
Here's the part now with the recess done, and the holes for my 3.5mm pins added using the machine's "canned cycle" for bolt circles.
Now without removing the part from the vise I used a 1/8" solid carbide 4-flute end mill to create the square for 1/2" drive extension, ratchet or )preferably) torque wrench. After a little ScotchBrite wheel deburring, this is what it looked like.
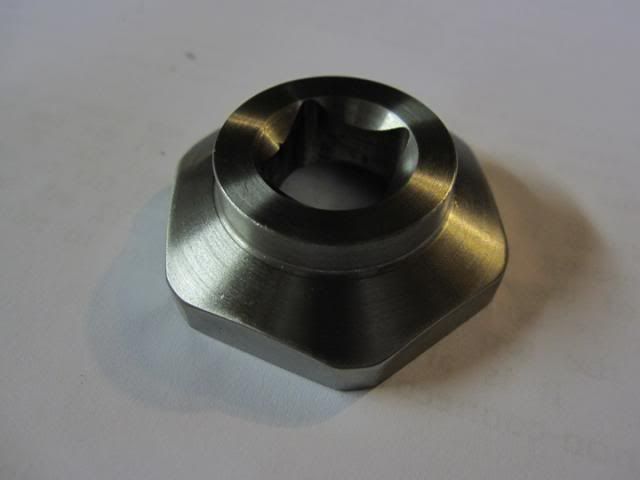
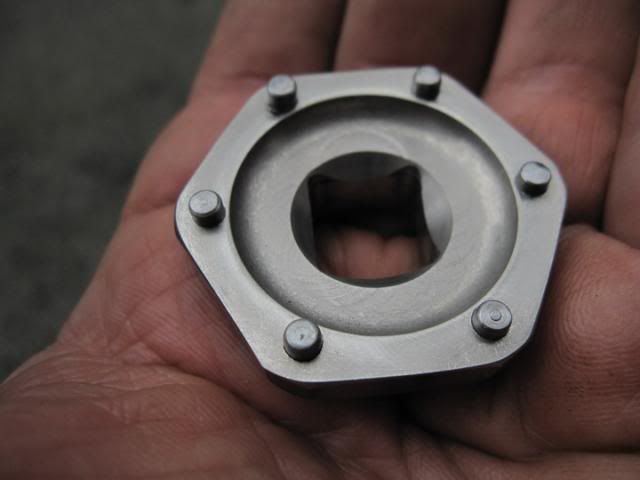
The last step (or so I'd hoped) was to make the 3.5mm pins and press fit them into the tool. Because I didn't have a collet stop and deburred/chamfered the pins by hand, some sunk into the holes a little deeper than others. It still looks OK.
Unfortunately, the 1" diameter on the back of the tool just hit the bottom of the handlebar. If I had the XC version of this bike or it's taller bar risers, no problem. For my stock "roadie", I'll have to make an adjustment. I went back to the shop and cut a bigger radius on the corner, using the only tool I had in my box even close. The radius on the tool is about 4mm (5/32"), and now.....IT FITS! There's little room to the bar with an oversize extension, but normal ones should fit fine. I may make a few more, and could opt for a 3/8" drive because it's only torqued to 18ft/lbs.
I had fun today!
2021 Triumph Street Triple R, Sapphire Black

Bad ass. Props for having both the tools and ability to do this. I wish i had the ability to create fixes for some of the aggrivating fixes i frequently do.
Any thoughts toward patenting this?
09 Ex500- totalled
08 SV650s!!!
Cages: Ford Excursion
Ford Mustang Gt
Toyota Rav4
Thanks. No plans for that. I don't think it's worth the expense and aggravation. I'd consider making a few for sale, though with a total of about 3-1/2 to 4 hours in it I don't think I'd be able to get what they're really worth. To an owner of a bike that could use it, it might be hard to justify. To a Triumph shop, this would be saving at least a 1/2 hour of labor on ever 6,000 mile service intervals they do. That would pay for a $100 tool in a hurry.
2021 Triumph Street Triple R, Sapphire Black
Absolutely. They may love you for the savings.
09 Ex500- totalled
08 SV650s!!!
Cages: Ford Excursion
Ford Mustang Gt
Toyota Rav4
Wirelessly posted
Ken knows a thing or two about machining, and photography.
Thanks Degsy.
After reading through the factory service manual I find you still have to remove the top triple clamp to actually adjust the headset bearing preload. All this tool does is save a step of taking 4 bolts out. If the cables don't have enough slack, you wouldn't be able to lift the triple clamp over the top of the steering stem. On a stock "roadie", there's plenty of cable slack as the most popular mod is to put 20mm higher bar risers from the XC version. This was just a solution in search of a problem, and excuse to use the new-to-me CNC machine.
On my bike that nut was so loose I turned it with my fingers. When I tried to snug it up I couldn't get a wrench on it securely, hardly at all. This tool solves at least that problem. Yeah, machining I know well, motorcycle repair I just limp along.
2021 Triumph Street Triple R, Sapphire Black
If i had these tools and know-how, I'd never leave my garage. I'm jealous. Thx for sharing, very cool.
def good work, and thanks for sharing
Thanks guys. If anyone would ever like to use my help with a project, let me know. I'll do things for just the cost of materials and tooling (usually no tooling to worry about.) Also, if you desire some lessons I'm a very good "shop teacher" and would be happy to do that. Just send me an e-mail or a PM here.
Ken M.
2021 Triumph Street Triple R, Sapphire Black
18ft/lbs its no wonder it loosens up all the time. my bike is 18 on the lock nut under the top clamp then 76 on the top nut
that's a really nice looking tool. wanna make me some stuff? I don't know what I need made though
LRRS Am #331
Graphic Tailor / Woodcraft / Armour Bodies / Suomy / Cycle Performance Autobody / Shorai / ChickenHawk Racing
It turns out that the 18 ft/lbs is the setting for the preload on the bearing adjustment nut, and like your bike the top yoke nut that my tool fits is 66 ft/lbs. The nut on my bike was two-finger loose. With my tool I got up to about 60 ft/lbs and the aluminum nut started feeling strange. It felt like it was galling on the steel headset stem. I stopped there for now.
I hesitate to put any anti-seize compound or other lube only because if the thing had loosened from factory setting to practically falling off in 6,000 miles I don't want to aid that.
2021 Triumph Street Triple R, Sapphire Black
Very nice work.......
LRRS EX 66
BostonMoto | Yoshimura | GoPro | K/N | Amsoil | Computrack | Vortex Sprockets |
EBC | Dunlop | Woodcraft | ArmourBodies | Fuel Clothing | Progrip | FmF Racing|
factoryeffex
Very nice work!
I made one for the Duc, but I was a lot less meticulous

Could you have faced and done the chamfering on the lathe while turning down the pin?
That is sick. Wish I had a setup like yours.
-Christian LRRS/CCS HasBeen ECK Racing
2011 Pit Bike Race CHAMPION!
And Tricky, what is the reason if there is one for having every other pin chamfered?
-Christian LRRS/CCS HasBeen ECK Racing
2011 Pit Bike Race CHAMPION!
Looks great to me! On the Duc you have a clear shot at it because you don't have to contend with a solid handlebar running over it, right?
What are you using to drive it? Got a pic of it in action?
2021 Triumph Street Triple R, Sapphire Black
Yeah, the Duc has a straight shot to the nut on top of the triple. I just machined a 19mm Hex on the top of it and drive it with a socket since space wasn't an issue (and I just kind of wanted quick & dirty). The pins are just 1/4 bolts threaded into the tool and turned down. The reason half are chamfered is actually pretty scientific. I can't get into details, but I can say it's rooted firmly in the beer/initiative matrix.

I like the bolt idea....very noice.
-Christian LRRS/CCS HasBeen ECK Racing
2011 Pit Bike Race CHAMPION!
What the torque setting on a Ducati and which model is it? I'm curious because the numbers I'm seeing seem to be very high for that nut. Tightening mine definitely seem to cure a clunk!
2021 Triumph Street Triple R, Sapphire Black
Wirelessly posted
60+ lb/ft on an aluminum nut onto steel is high up there! I would most definitely anti-seize the threads before i asembled that Ken. With fine threads you want to reduce the risk of stiction and overshooting the torque.Originally Posted by SprintPoser
Not sure... I just set it so there's no play and no binding. It's real, real, REAL light torque, hence the tool made out of 6061
It's basically just setting the bearings. The clamp bolt (and the triples) hold everything tight. Not sure what the manual says, but that's how the Duc techs I've talked to do it.
 Posting Permissions

 Reply With Quote


