0


So I got inspired by the garage build post by "ceo and a bunch of numbers" and figured I would post my own experiences rebuilding my garage. Maybe it will inspire others here. I will post this a bit at a time since I doubt I will get it all up in one shot. The garage is not done yet, but I'll try to bring you up to speed.
Also, if anyone has or knows someone with a steel, insulated 10 or 11 foot windowless garage door that is 7ft high I'm trying to find one free or cheap to replace the door I have on the garage.
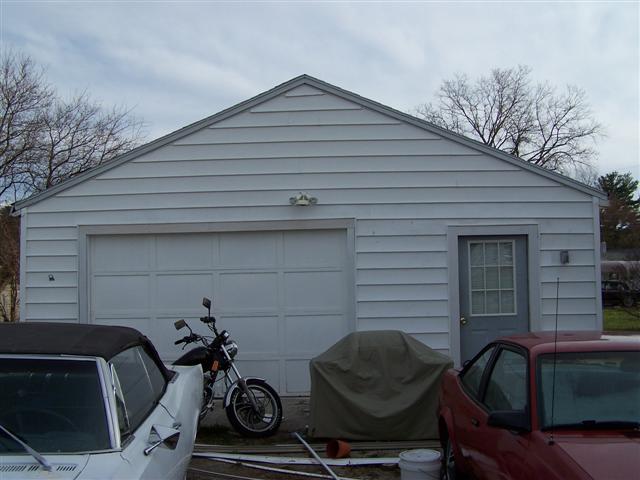
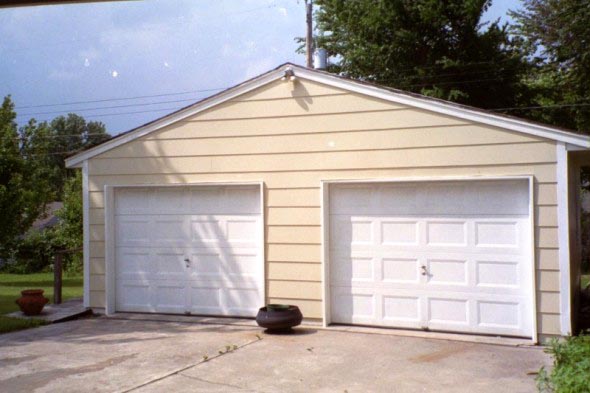
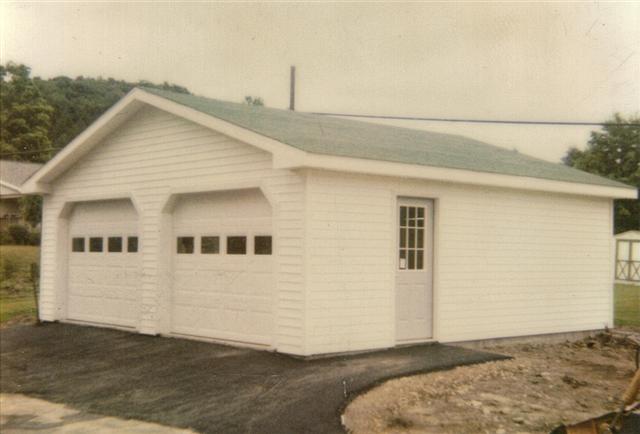
My wife and I bought our house not too long ago and it came with a lovely little detached two car garage. The only minor problem was that the roof had been hacked to hell on the sides, the front was caving out, the door on the side was rotted and falling off, the window on the side with the door was missing and had been replaced with a piece of Styrofoam and the other window fell out whenever you opened it. But hey, it was a garage.... it was also a garage full of crap from the previous owner... so I moved our 68 ElCamino SS into the garage, put all my junk into it from moving and proceeded to dream about the day that the garage would be worth using.... Took me about a year to actually get to it.
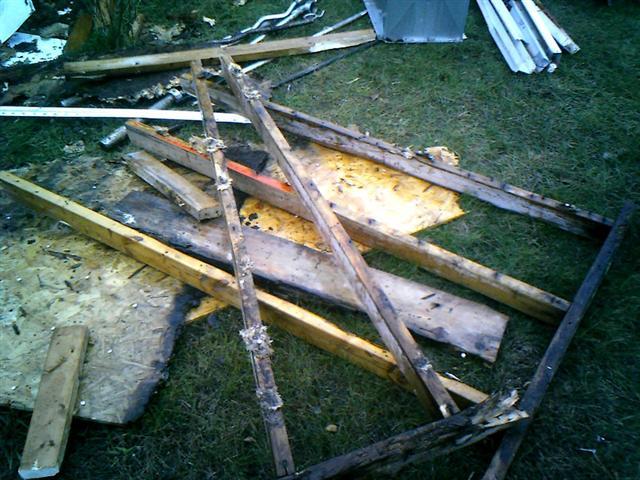
When I started the garage looked something like this (I don't have the actual original photos as I lost them) but think of the fallen down bastard child of these pictures:
So I intended to write more then that in my first sitting but the wife lady is telling me we have to get to a friends for dinner. So stay tuned, there is a LOT coming up.

Nice way to leave me hanging...
"I'd rather ride a slow bike fast than a fast bike slow"
Bikes: Ducati: 748 (Track) Honda: RC31 (Race/street)/ CRF 110 Mini Moto/ Hawk Endurance Racer Kawasaki: ZXR1200R
BOMO Instructor
EX# X
Originally Posted by Doc


I think you answered the question already, you stole someone elses garage or you are good at "vintage look" photoshop
Looks nice btw...
Yeah, sorry about the false start there... I made sure I got all the pictures ready and was all set to type of a good page or two but apparently it is a good thing my wife keeps better track of time and appointments better then I do...
So here goes some more.... with more to directly follow.....
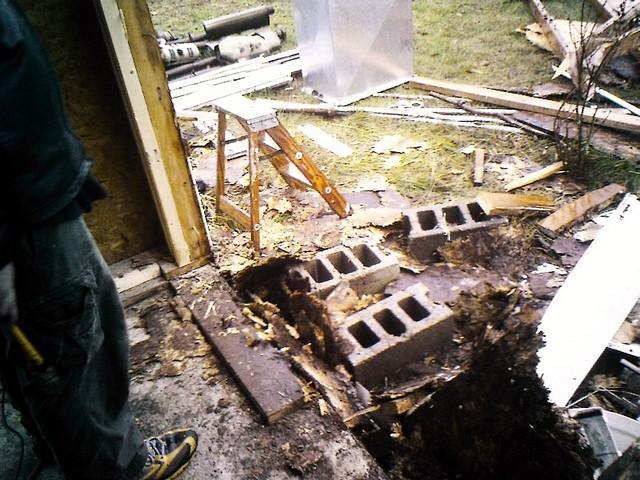
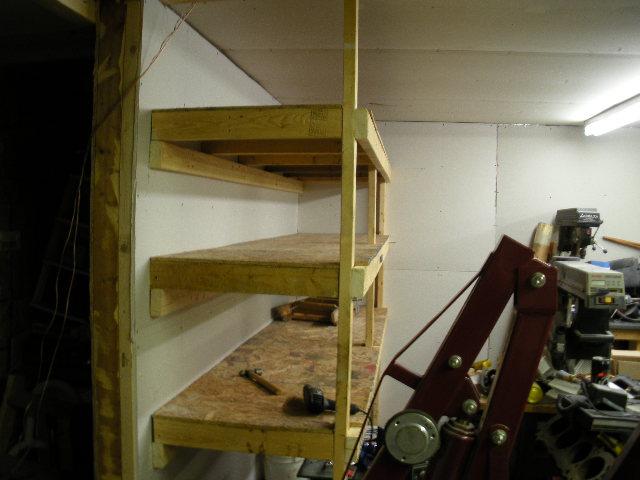
I didn't take pictures of everything but the first thing I did was build myself some super heavy duty shelves against the back wall of the garage. Then I looked around and realized the garage was probably going to fall forward if I didn't do something and it might be a good idea to fix it. So on a crazy spur of the moment decision one fall afternoon I tore off the front of the garage and started to rebuild.
I went ahead and made the garage door 11ft wide and moved the entry door from the side to the front of the garage. The reasoning behind this was that I intend to use the garage not to store cars but rather to work on cars and motorcylces. A larger door means more room to get around if I have one just pulled partway in working on it. Moving the door to the front means I don't have to shovel out an extra walkway just to get into my garage in the winter. I used two 2"x12"x14' boards as the header and made sure that they were triple studded underneath. This solved my problem of the front of the garage falling forward.
I couldn't, and still haven't been able to, afford an actual garage door. So instead I bought some 2x4s and some thin wall paneling and built my own garage doors. They came out pretty nicely.
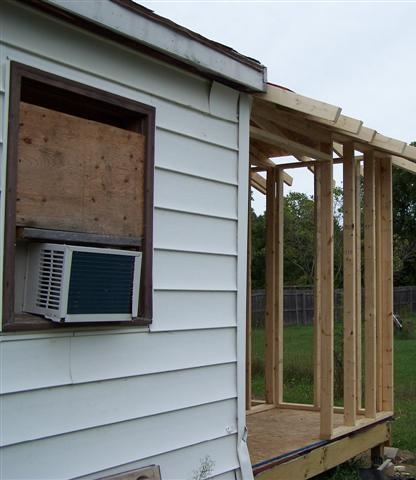
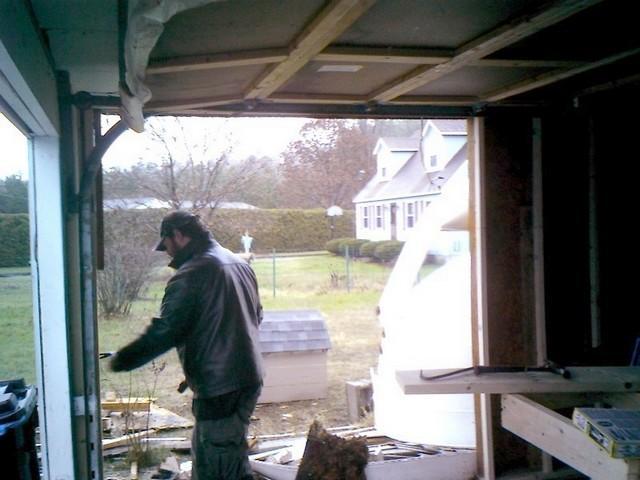
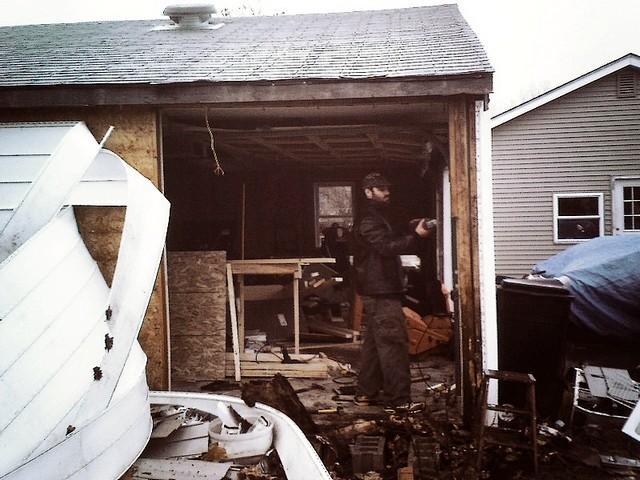
Here you can see the front of the garage about mid process. In the midst of redoing the front layout I found that whoever had done the garage before must have thought that having some sort of tar paper or underlayment below siding was just a suggestion.... Add another thing to the list of WTF were they thinking?!?!?!
You can see to the right off the door where the wood was all punky. I ended up replacing all this before I wrapped things up.
Yeah, that is my wife and her dad in the picture. He is a cool guy too. A goofball sometimes, but a good sport when we tease him about it, and hey, he races motorcycles, still, used to build guns and works at a nuclear power plant. Sweet. The 'thing' to the left of them is the start to believe it or not, a cat house I built for the cats for winter....long story.... In the end the garage looked a lot better, though still rough, but more importantly the front was no longer one sneeze away from falling off. Little bit of siding later and voila!
You can see in the background where the old door was. I just boarded over it from the outside for the time being.
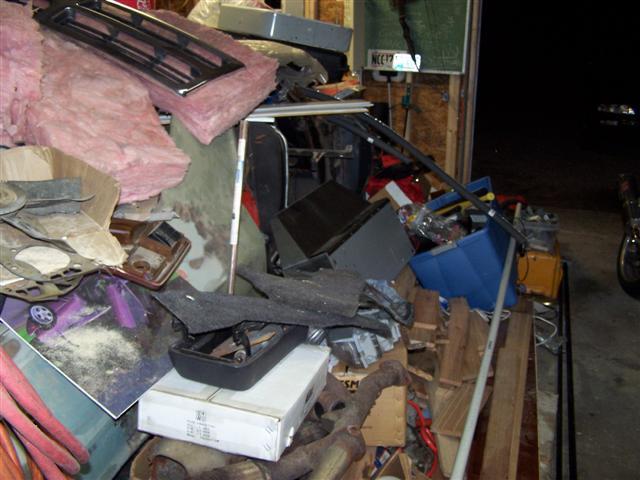
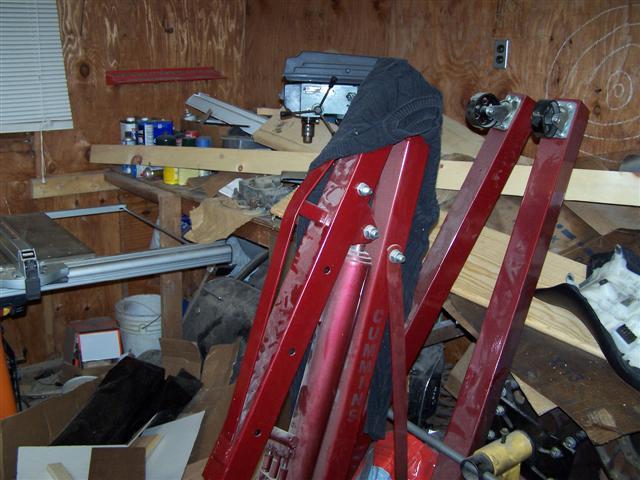
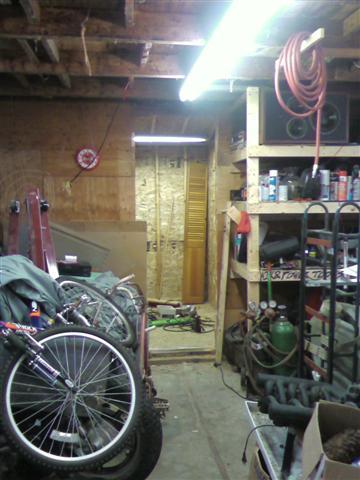
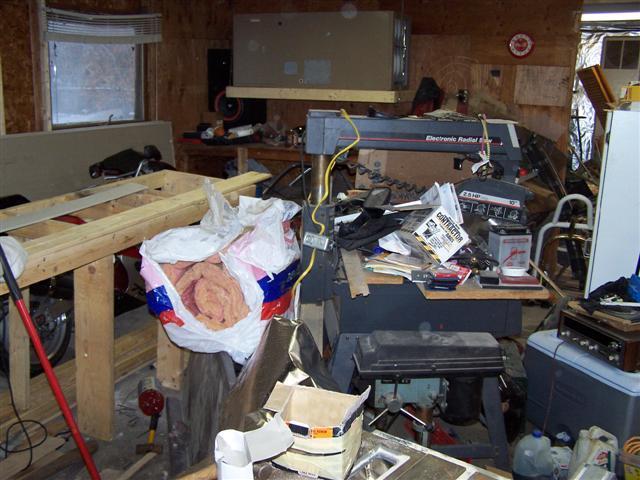
So now I had the garage at least shored up... the inside was still a wreck though.... Crap everywhere, the wiring was scary bad...and anyone that knows me knows I'm slightly crazy and 90% of the time don't give a crap about half the things I should so for me to say that... there was some rotting semblance to a work bench over on one side and some pegboard tossed on the wall. In the background right behind the bike and above the cathouse you can see that 'workbench'. You didn't want to lean on that puppy...in fact, I think just what I had on it so far was too much...
....oh and junk, did I mention there was a LOT of junk? A lot of it was, I'm embaressed to say, mine; but there was also a LOT there that wasn't mine in but was apparently an added bonus when we bought the house... Personally I would have rather they kept their crap and gave me a 10 dollar discount on the sale price...
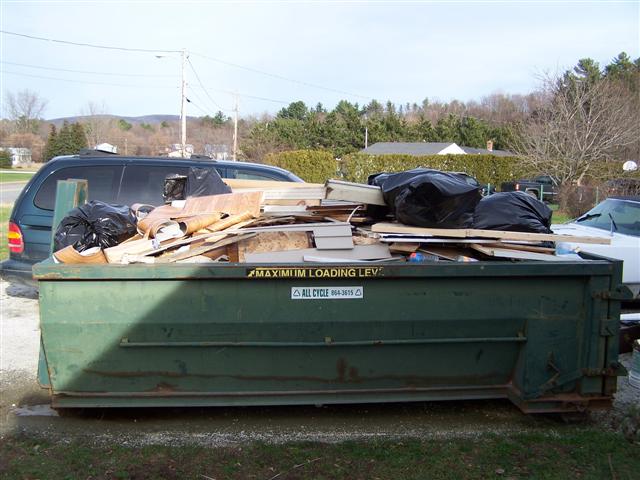
So like I mentioned when we first bought the garage there was a tiny amount of crap left over from the previous owners. By tiny I mean 2ish of these dumpsters full of stuff.... It was packed in every corner of the garage, in the garage attic, in cabinets etc...
With somewhat of a start on clearing out the place I got to work turning the garage into a real useable space. Since I would not be hiring anyone to do the work (I am very handy and have worked construction, have an electrical degree and have done plenty of plumbing both water and gas)the first thing I did was look for recruits. The deal, 'you help me make something out of the garage and I give you a key so you can use it, and my tools, whenever you need whether or not I am there.'
And so it began....
Some tips:
1. Pictures need to be of higher resolution (10 MP minimum) and greater in quantity.
2. Ceiling height must be far below all legal and practical limits.
3. All surfaces must follow OSHA midget workplace guidelines.
4. More OCD and anal retentive features would be good as well.
Zip-Tie Alley Racing
LRRS/CCS #103
PPS | Dunlop | Boston Moto | Woodcraft & Armour Bodies | 35 Motorsports | Pit Bull | K&N
LMAO.... yeah... like, I said, inspiration to actual post came from your posts, I read those with a great deal of interest...I did decide to go for the 'you get the idea' sized pictures without the 'oh shit, does my isp cap my monthly gigabyte allowance???' aspect of things.
OCD can be fun...like when people always have to count things and you carry around a bag of rice...or the people who always have to pick up change on the ground... good stuff....
moar pics asap.
The first person I recruited was my brother John. Besides being a cool brother, insofar as brothers goj/k, he is also a car and motorcycle enthusiasts and very mechanically minded. He has probably rebuilt more engines then I have and he also happened to have worked construction for awhile.
Looking around the cluttered garage we both agreed that clearing the place out was a most. Fortunately before we did that and realized we had enough space to work on stuff the way the place was, we both had a Tim Allen moment....bigger is better. We had a limited budget but we wanted to expand the garage. We decided to build off the back off it and add some storage. Permits weren't too hard to get and with those in hand we proceeded to expand the 24x24 garage to make it 24x32. We decided to divide the addition up into 3 sections. One section would open into the garage and be subdivided into a storage room a kitchen and a bathroom, another would be a motorcycle bay and would have a separate small garage door to the outside and the last, and smallest section, would also open via a large swinging door and would just be for storing lawn and garden tools, snow blower etc.
Materials cost us about $1500 not including shingles. We poured 3 huge sauna tubes as footers and brought lag bolts out of them to secure the floor to. This would allow us to expand in the future if we wanted to or to replace any wood that we might need to as the supports were bolted down to the concrete rather then stuck in it. We framed up the floor and used 14inch concrete lag bolts and an impact gun to secure it to the existing concrete pad. For the floor we built the frame with 2x10s to make sure it could handle the load. Two layers of heavy duty plastic vapor barrier were laid down and stapled up under the framing. On top of the framing we then went a step further and put a layer of tar paper under the flooring. The floor was made of two layers of 3/4 chipboard. The top and bottom layer were turned 90 degrees to each other so that the seams were all staggered.
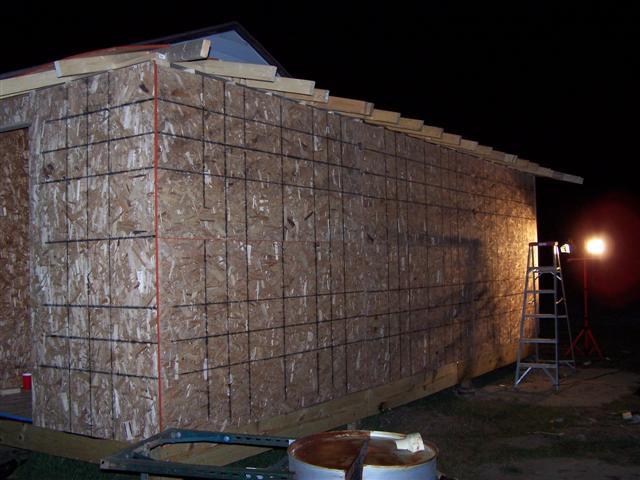
Wall framing went rather quickly and soon we had something resembling and addition....
In the picture above you can also see that lovely rear window that was in the garage when we got it... need to clean that glass...hard to see through...oh hey wait...that's plywood...love it.... The opening nearest the existing structure is for all the lawn and garden equipment.
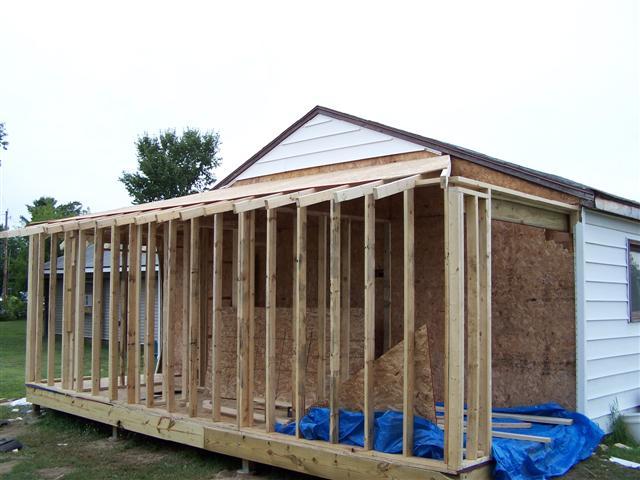
Here are some more pictures of the framing, you can see the footings in the back. They are WELL deep enough and haven't moved at all thanks to a yard that is all sand...oh...being about 5/6 feet down doesn't hurt either....
Unfortunately between getting the floor and walls up and actually putting the ceiling on we had a huge rainstorm. While I attempted to cover the flooring as best I could, rain still got in and went down between the double layered flooring and the vapor barrier below it. That sucked. Eventually I ended up cutting drain holes in the vapor barrier in the middle only which allowed all the water to drain. The floor was quickly moped up with a few of my wife's good towels.....yeah, guys...don't do that...my bad....
At that point we decided it would be good to get the roof on quickly.... I wanted to do a hip roof to cut down on material needed and to give the addition a little character. Anyone that has framed a hip roof before knows they can be an experiment in frustration if you haven't done them before. It turned out just fine though and we got it up in about 7 hours.
The sheathing on the walls quickly followed and was up in about an hour.
The big open wall in the last picture is where the motorcycle bay would eventually go complete with it's own separate garage door.
As you can see we didn't cut the overhanging roof framing till after we were all done. Once done we took a level, measured out the right distance and cut each one straight down. Gave us more screw-up flexibility and came out looking great lol.
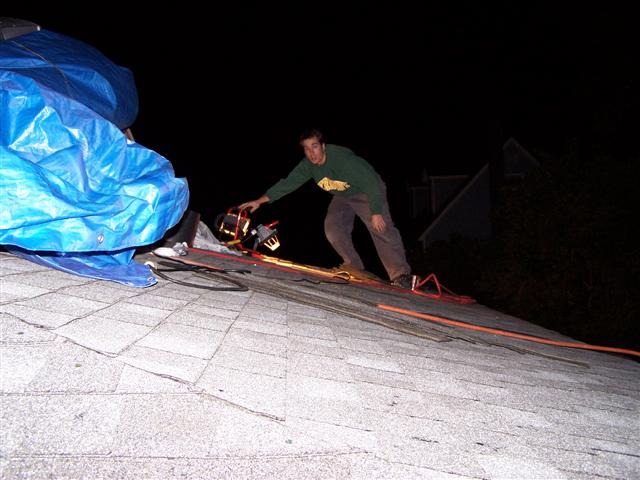
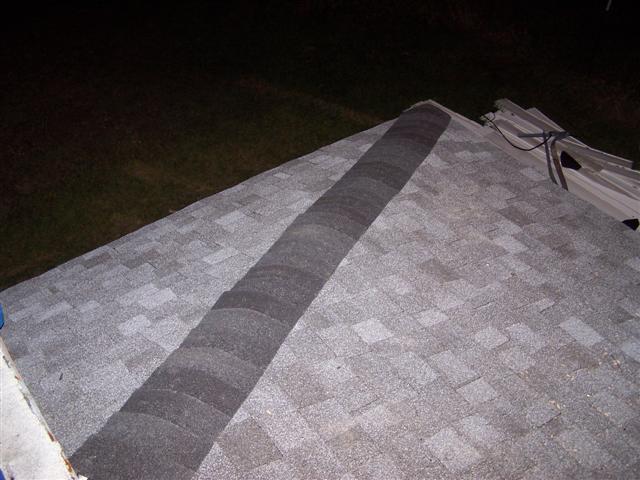
Next up were the shingles... nope, not the time your roommate in college got every time finals started coming around....
My brother used to do roofing so it was no problem at all to get the roof put on. The only drag is carrying all those bundles of shingles up the ladder.
This whole time my neighbors, as always, were great and didn't complain at all. The shingles we finished putting on around 12 at night....no complaints about the nail gun and no pissy looks the next morning either...
The next thing to go up was the siding on the walls. You may have noticed in some of the pictures that my house has tan siding with narrow simulated boards whereas the garage has single wide white vinyl siding. My neighbor was able to find another neighbor right down the road however that had the same siding as my house and was in the middle of replacing it. He gave us a truckload of it and we decided to use this for the addition. For this we recruited my buddy Eric, another biker, to come help us. A few beers later and we were having a contest to see who could say the creepiest or most politically incorrect thing in such a way that it sounded like we were referring to putting up the siding without cracking up.... The wife appreciated it so much she decided to go inside and not help for the rest of the evening...lesson learned...ish...
sweet
Better a Racer for a moment then a spectator your whole life!
Posted by Jane in BoxChat
Jaynnus - I can't regret what I don't remember
Originally Posted by gmdboston
Guys, its Maine. The waitresses have more tits, than teeth......

Yeah, just go ahead and give all the credit to ShortStack and a bunch a numbers
That's not a build thread, This is a build thread
Garage looks great
If your helper wants to learn the proper way to figure/cut a hip roof, send me a PM
Yamaha
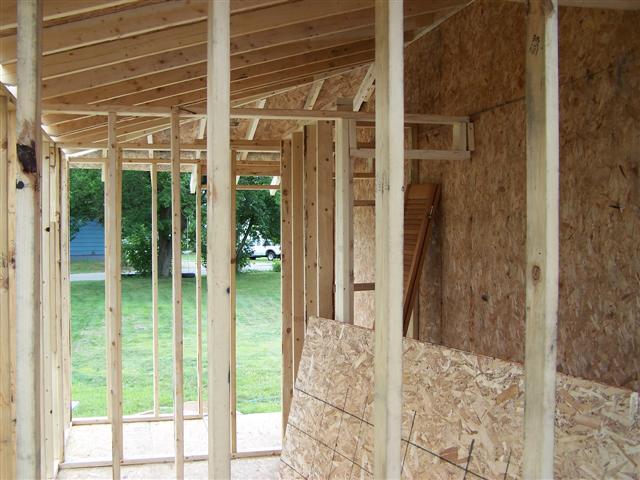
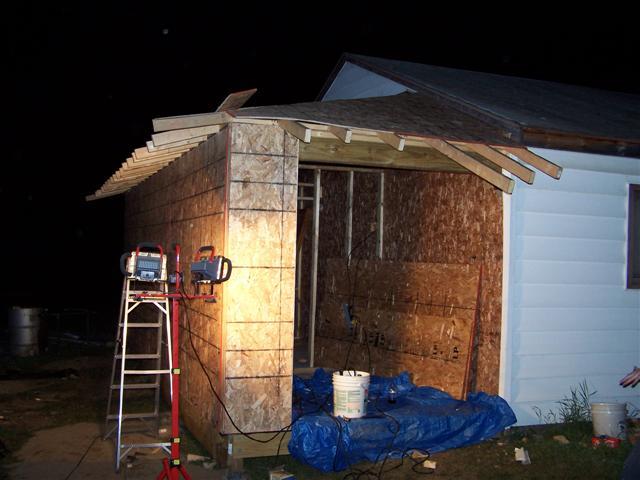
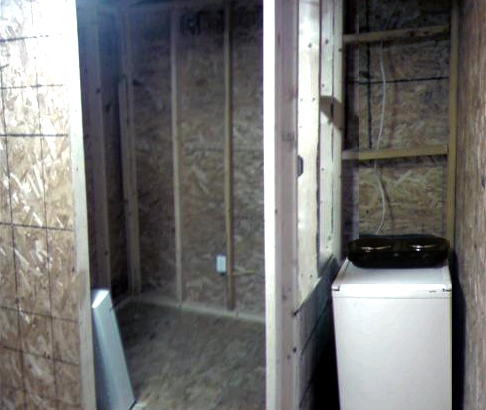
Now that I had the siding up and a roof on it was time to open the place up into the garage, oh, yeah, we waited till it was done to open a door through the existing wall into what would be the storage room, bathroom and kitchenette. That's what sawzalls are for after all....
Looking straight back you can see the opening I cut through the wall for the door. That section is about 6' by 8'. Looking to the right is the section that would be the kitchenette (more a closet with a fridge, stove and microwave...more on that later) and the 6' by 6' bathroom.
The picture above looks warped because I couldn't get the whole thing in the frame so I had to stich to pics together.
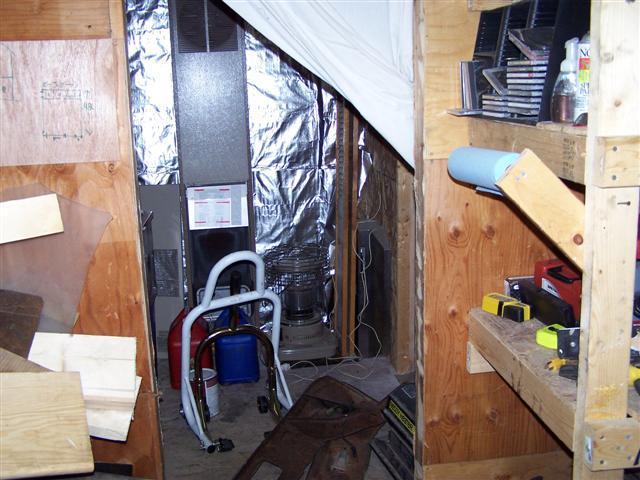
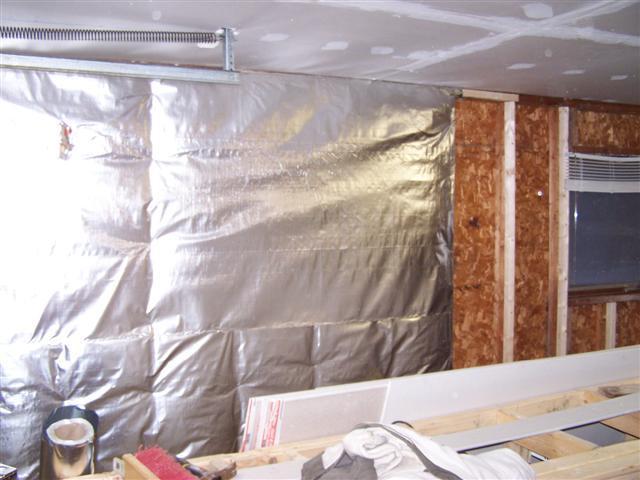
In the previous pictures you can see that the walls are covered with plywood...no insulation underneath...just plywood. We decided to immediately insulate the addition. On top of the insulation we placed reinforced perforated foil radiant barrier. Yes, contrary to naysayers, that stuff works amazingly well!!!! It basically reflects your body heat etc right back at you. Even with sheetrock over it you can still tell a difference. About this same time I replaced an old fugly heater in my house so I stole the old one for the garage. You can see it in the back picture here.
I went ahead and had the gas company bring out a seperate 500 gallon propane tank for the garage. Gas company showed up and I showed the guy what I was doing, showed him the heater and location, asked for any pointers he might have and was told I should be all set and that everything looked fine. Got the hole cut in the wall for the heater vent and installed all the gas lines, safety check valves, shutoff valves, sediment trap etc and called the gas company to come do the final line.
It's never that easy though...the gas company showed up on time and promptly informed me that 'nope, can't use this heater in a garage unless it is 18 inches off the ground as a gas build up could cause the building to explode when it ignites'. I tried to explain that if the building was gonna blow up it would probably do it while I was welding or cutting steel and shooting sparks all over the place that way. He didn't appreciate my take on his concerns and left without hooking up my gas. He was kind enough however to leave me with 30 feet of free copper tubing for the gas line since I would have to pay the 30 bucks for him to come out anyways. Said I may as well get something out of it.
At this point Dave Parrow, another biker some of you know, started helping me with the garage as well. He kindly donated a bigger and much nicer heater to the project. Instead of putting this in the storage room I built a shelf and my friend John Oleen, Dave and I all hoisted it up on it.

There comes a time in all real men's lives while they are standing in the garage contemplating life and other deep and meaningful things (like dinner, sex and how much beer is left in the fridge) when they realize 'self, I am running out of good music to listen too and that boom-box sitting on the floor can't play Motorhead loud enough to make my ears bleed.' That is the time when we are faced with a crucial decision. Do we go on living our musically stagnant lives listening to the same 5 cds over and over or do we fix the problem.... I decided it was time to fix the problem....
It was awesome...the same day I was thinking that I took the motorcycle out in to Burlington. On my way I ran into some traffic and took a shortcut behind a building. As I cruised through I glanced at something sitting in front of a dumpster and thought "Oh hey look, one of those touch screen kiosks" then what I had just thought hit me and I jammed on the brakes so hard I popped a nice little stoppie and turned around. Sure enough right in front of the dumpster was a kiosk with an LCD touchscreen in mint shape. A sign on it read 'broken'. I calmly popped the bike on it's kickstand, casually carried the kiosks into the wooded area behind the dumpsters and proceeded to cover it with branches and leaves... Dirty deed done I went and got Dave who wasn't too far away. We went back and loaded the kiosk into his car and brought it to the garage.
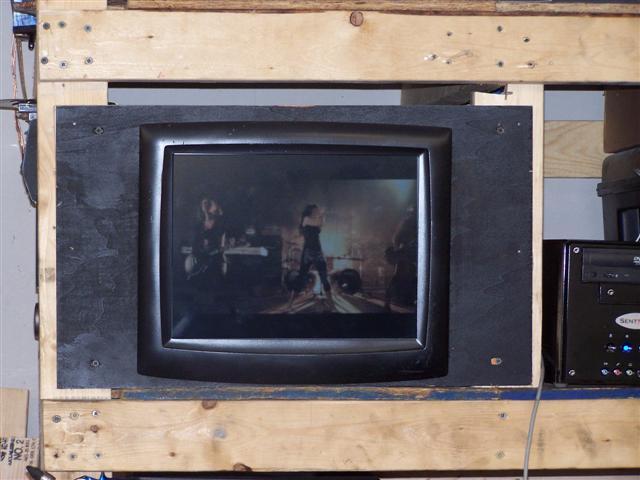
Sure enough, screen and touch screen worked perfectly. I work on computers for a living so I had a few spares. I grabbed one and an old receiver and soon had my new music system.... full touch screen interface with 60 gigs worth of mp3s (yeah, they are all legally mine so stick it:p) and a wireless card so I could run Napster and other streaming audio through it as well.
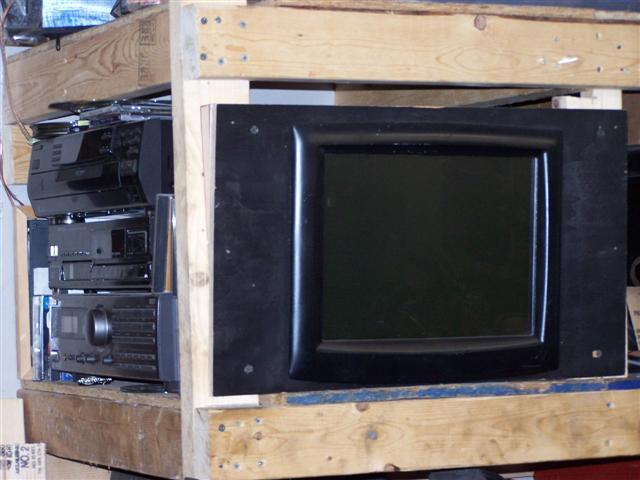
I used meedios for the interface so at a touch I have weather, news, music, movies, streaming tv, drink recipes etc. I even uploaded about 30 gigs worth of pdf motorcycle repair manuals and installed ShopKey.
This is what the touch interface looks like:
Anyways, back to the garage build....
With music all set it was time to get down to insulating the garage.... by now fall was fast coming to an end.
Our first step was going to have to be to remove all of that lovely plywood that covered all of the walls...
Last edited by yesterdayze; 08-27-09 at 12:01 PM.
Lol, yeah, that is a hell of a build!!!! AWESOME!!!! I have nowhere near the money I would need to do something like that, but someday I hope to. I am still young (27) and only bought the house 4.5 years ago so who knows...
I would appreciate it for sure. We kinda winged this one as you can see. It holds up no problem fortunately and the angles came out great. I can walk all over it with no give but man was it a drag to frame.
Whoa, that touch screen music system thing is awesome! Nice work
That's something a lot of people don't plan ahead for, the garage entertainment... as you saw I ran my speaker wires in the walls before I put up the sheetrock; it really cleans things up.
Zip-Tie Alley Racing
LRRS/CCS #103
PPS | Dunlop | Boston Moto | Woodcraft & Armour Bodies | 35 Motorsports | Pit Bull | K&N
im not lucky enough to have a garage so i had to build two sheds one for junk one for bike. And i thought of the shed entertament when building so added electical to play the radio
Thanks! Yeah I absolutely love it. Come in, pick anything you can think of be it music, a movie, music videos whatever right while I am working. I also love being able to pop open a shop manual for almost any bike you can think of.
Good call on the wires in the walls. I ended up running mine through the ceiling for the front speakers and tucked in where the ceiling and walls meet as there will be molding there.
Bummer man, not enough space I'm guessing? I kinda made that a prerequisite to buying a house, had to have a garage or space for one and fortunately it worked out. The house itself...yeah...whole nother story...
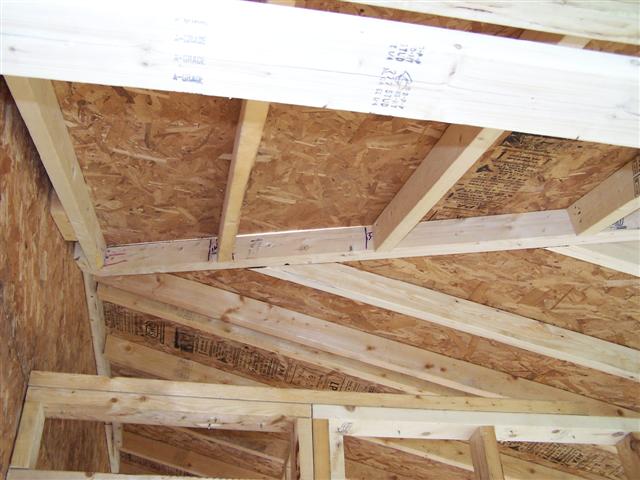
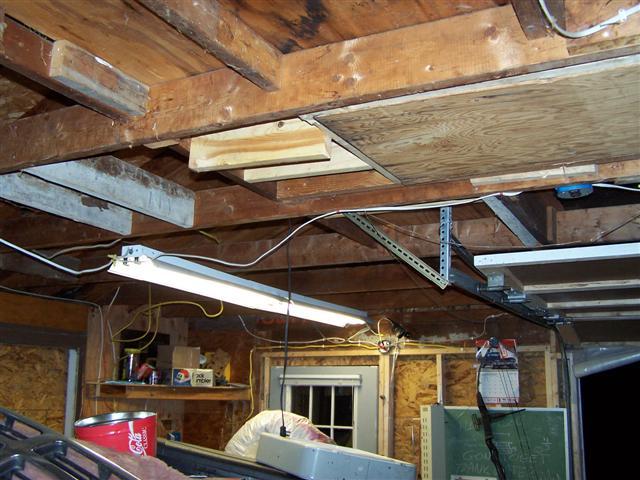
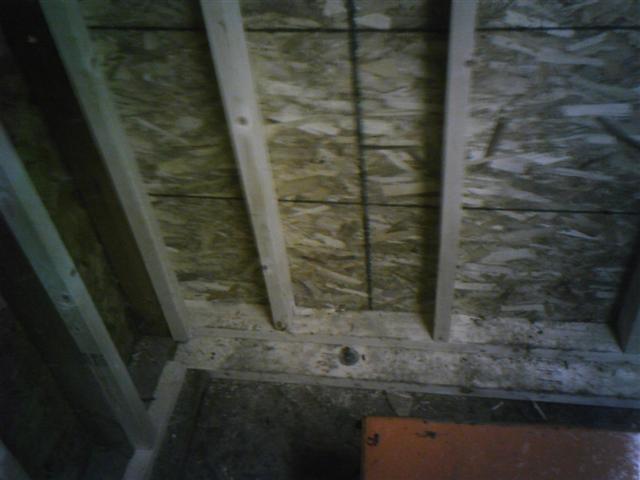
We decided that open rafters problem weren't our best bet in keeping in heat so we started in on roofing. In retrospect we should have done the walls first... oh well....
Above you can see the open rafters we had. I had more and better pics but the memory card they were on went missing...
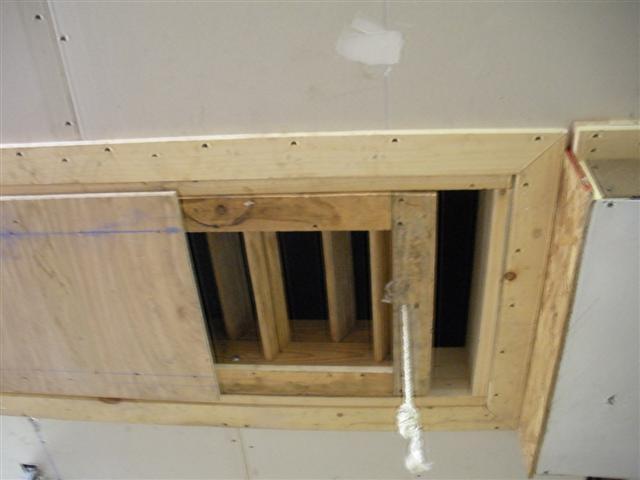
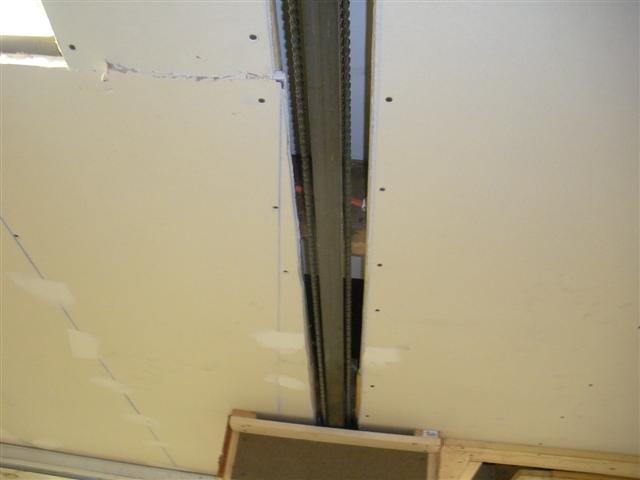
AJ, another biker many of you know, does a lot of sheetrocking. I had only met him recently but this dude not only helped me get strapping that I needed but he also brought all his equiptment over, including a sheetrock lift, and lent it to me. He also supplied screws one day when I ran out and refused to let me refund him for them. Way awesome of him!!!! It would have SUCKED to put the ceiling up without that help!!!! We did have to get funky around the garage door opener as I couldn't bring the rail down any further. I also tried to neaten up the drop down stairs but they were falling apart so badly that I just endud up framing it in a little more nicely and called it good.
The area above the garage door opener rail will end up just having a board set down above it then insulation.
It was amazing how much of a differenc just that ceiling made both in heat retention, even without insulation yet, and in the amount of light it reflected back into the room.
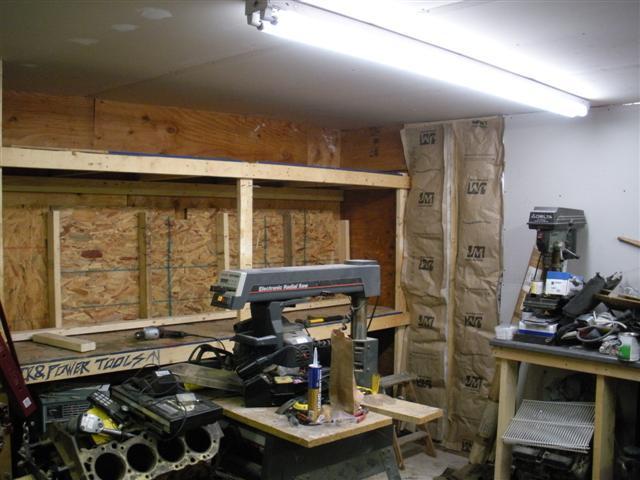
We still needed to do the walls. As you recall they were covered in plywood and uninsulated. They were also 2x4 walls and I wanted 2x6. We devised the idea of screwing and gluing 2x4s that had been ripped in half to the exisitng studs to turn them into 2x6s. First we had to get off the dump plywood...
For the interior demolition I got a few more buddies to help me. I had my brother John, I had John Oleen, Hagan Brady, Dave Parrow, Anthony Dethridge, my brother Steven and I think a few others...sorry if I forgot you....
We started by moving everything to the middle of the room and then proceeded to hack tear and smash off all of the existing plywood. It was great fun in some areas because what we failed to think about was that the plywood in some cases went up behind the new ceiling... OOPS.
Either way we go it all out and threw it in the yard. Wife loved that.... neighbours must have too though they insisted they didn't care and just thought it was great that I was turning the place around so much.
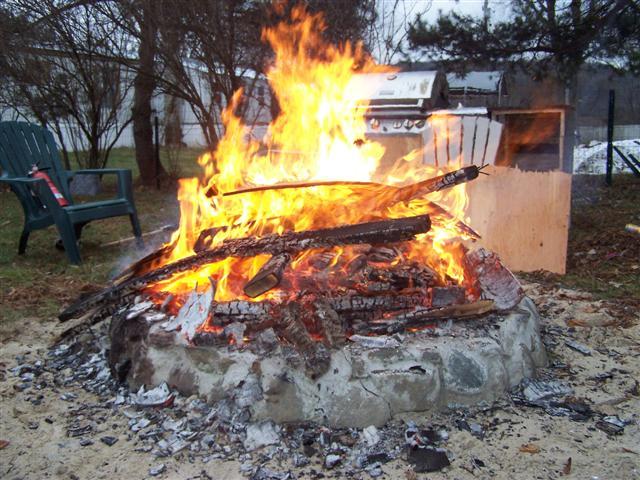
One day while the wife was at work and I was at home chilling with the new puppy I decided it was time to safely dispose of the rubble. None of it was painted so of course I thought...FIRE!!!!
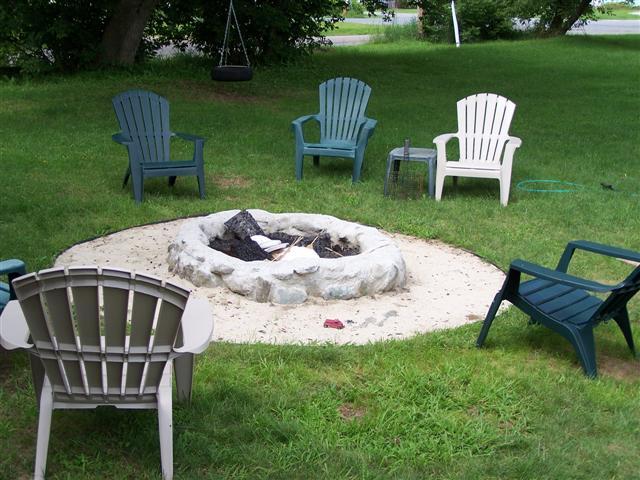
A while back I had built a nice little firepit so we could sit outside, cook smores and watch movies on a 12ft screen I attached to the back of the house. During the summer when I built it it looked like this:
It was a nice cold fall day. In fact it was 18 degrees out (I checked before I burned). I piled the wood up and within half an hour I was sitting about 10 feet away from the fire wearing a tshirt and a pair of shorts reading Dean Koontz. As you can see below...I'm all about safety; no seriously, see, there's a fire extinquisher there in case my book caught on fire....
By night time the wood was almost all gone and it started to snow. Only it was so hot around the fire that it was turning to rain around it and there was huge puddle just pouring steam.
When we cleared the walls we found one minor 'oh crap'. Turns out that the roof had a leak on one corner and all the water had been going down the inside of the outside of the wall..... My friend Dano, another biker on this forum, Dichotomous, came over and was gracious enough to let me boss him around while we replaced the wall. Said wall was so rotted that to take it out we just kicked it out then trimmed it up with a saw. We cut everything that was rotted back at least 6 inches past the rot then framed out a new wall and lifted and hammered it back into place using the exisitng floor lags. To save time we merely peeled back the siding to where we needed to go.
"But dude, mold is like penicillian right? and that stuffs good for you".....
When we were done we nailed the siding back up, fixed the roof (drip edge angle was wrong) and called it good.
You can see in the picture above where we started to screw and glue on the 2x4s to make the walls all 2x6 for the insulation.
Last edited by yesterdayze; 08-26-09 at 12:16 PM.
Good write-up thus far...
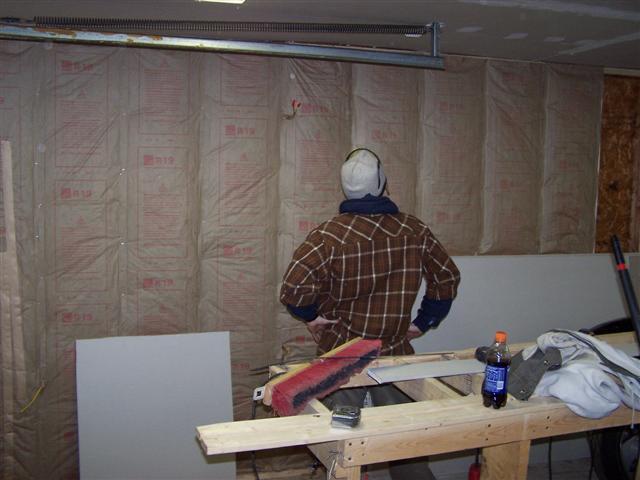
John, Hagan, Dave, Dano, myself and some other folks who popped in and out went to work on the insulation. It was great timing because Home Depot happened to put their insulation on sale the same week we got started. 50% off in fact so we nailed it. 2x4s were quickly ripped down into 2x2s and then screwed and glued to the existing framing. As we went along we checked each wall for integrity, shored anything up that needed it and cleaned the walls out.
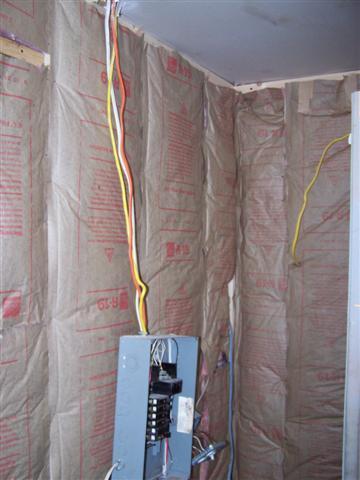
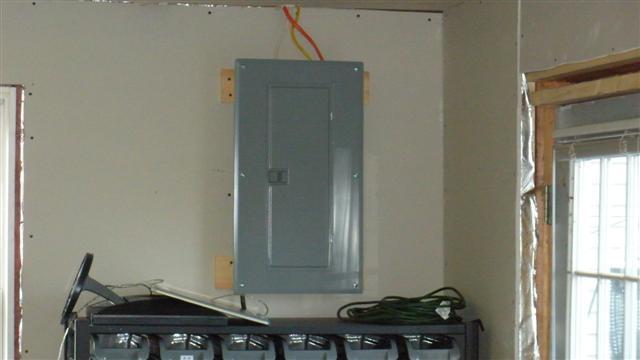
I have an electrical engineering degree and since the current wiring scared the hell out of me I bought a new breaker box and lotsa wire and went to town redoing the wiring. All of the 14 guage wiring was replaced with heavier 12 gauge and 10 gauge wiring (except for flourescant light circuit of course). Wires were placed through the studs and steel juction boxes were installed.
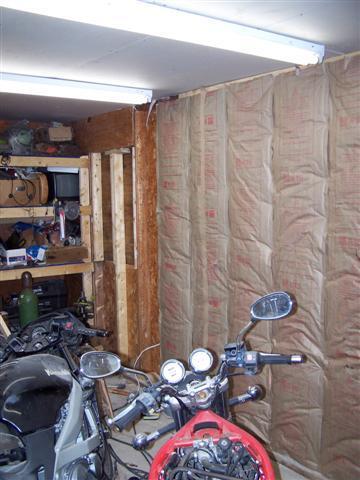
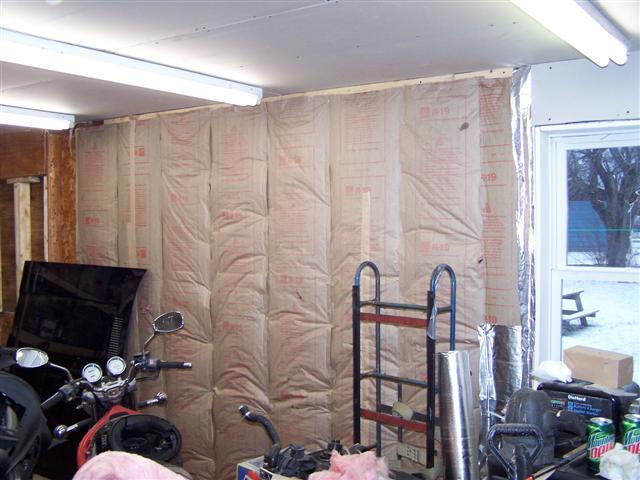
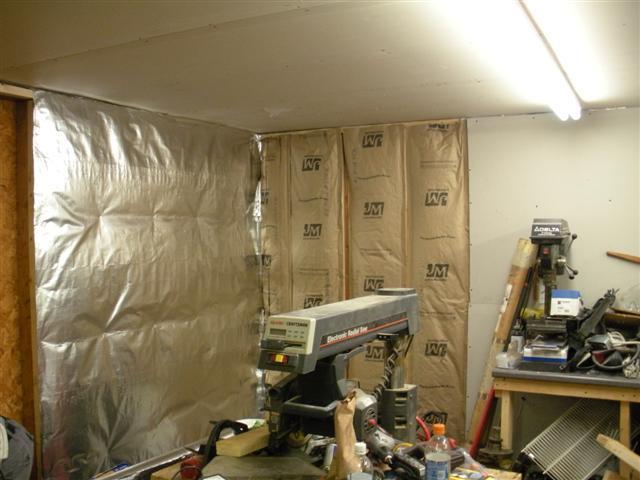
R21 insulation was then put in with the foil radiant barrier on top. By the time this all got started it was winter out and snow was halfway up the garage door. We could feel the difference as we worked our way around with the insulation and radiant barrier.
My brother playing it cocky.
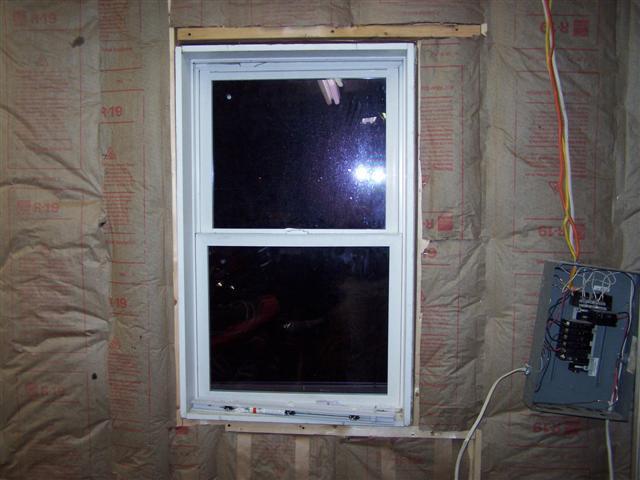
While we were at it I picked up 2 new low e double pane windows from recycle north. One replaced the window on the left side of the garage as you face it. We had to do some minor reframming but nothing major. The other we put where the old door had been on the side. The other window that had the board in it we ditched completely. The difference between drafty windows and good windows was shocking!
Yes, I know, it looks like the window is incorrectly framed, it isn't, the insulation just covers where it is done properly. We had framed it for a taller window but ended up switching so the header is up a little higher under the insulation.
Oh yeah, and the power box.... like I said... I don't get to worried... this was 10x better then what had been in there even being in the hanging off the wall state....
But as pretty as nice fluffy insulation looks and as shiny as the foil on it was we had to get the insulation up. Being on a budget it took me a good month or two before I could afford it. By then spring was supposedly on it's way....yeah right....
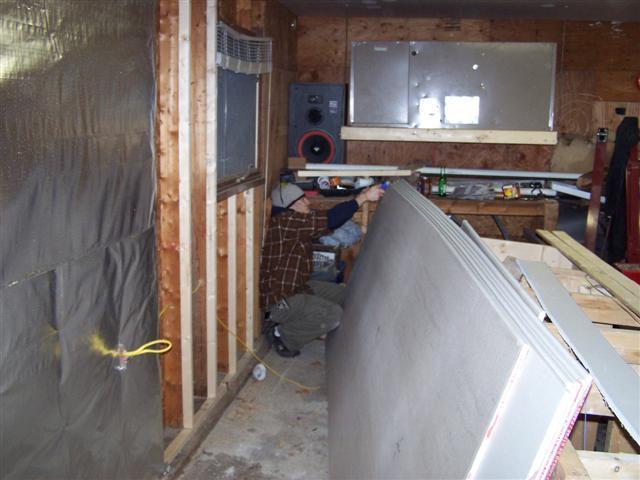
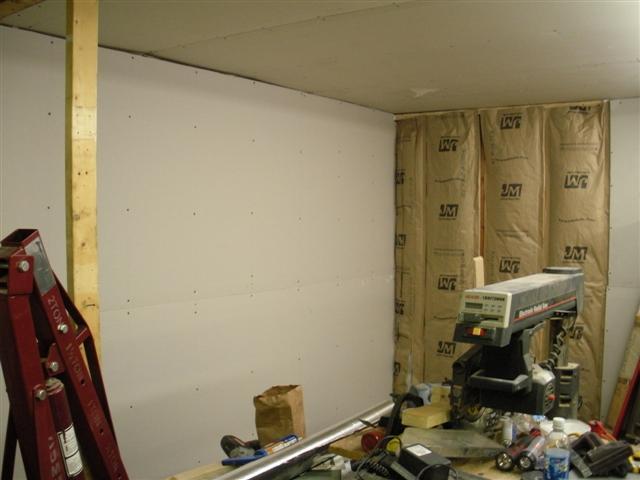
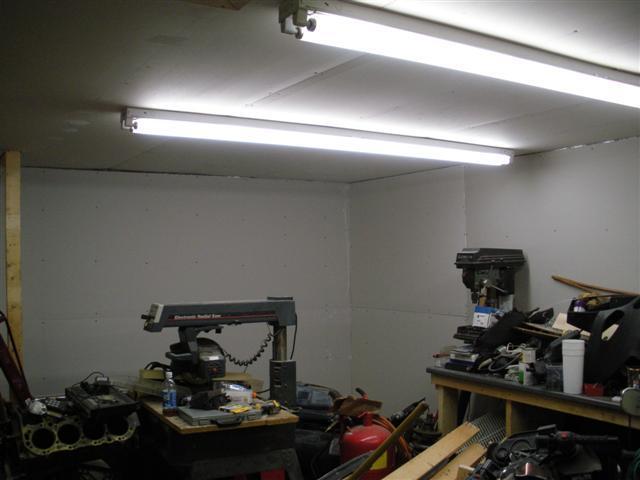
The first thing to get sheetrocked was the wall where the power box was... that let us get it put up safely on the wall thereby lessening the chance of hearing the admitedly funny but decidely not good 'hey look John has smoke coming off his hands and is still twitching on the floor'
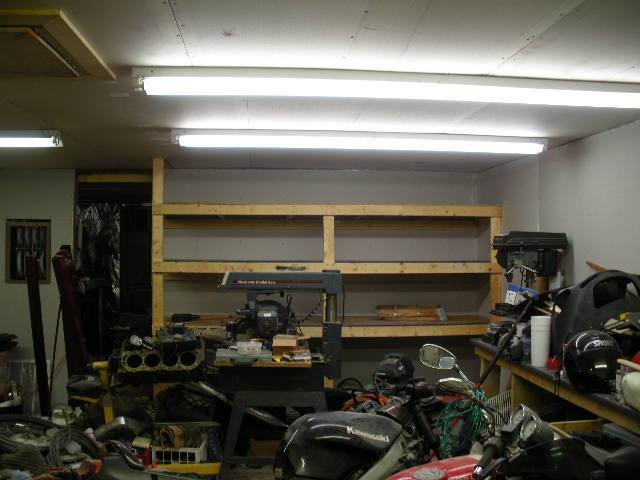
Sheetrocking went fairly quickly until we got to those bullet proof shelves I made. Yeah, had to tear those out, beef out the wall, recut them to still be the same depth since the wall was now thicker, put up the sheetrock and then put the shelves back... and since the music system was screwed to the shelves I had to do this without my nifty music system. Some of you pansies think you're tough cause you can work in 20 degree below weather, yeah, well try working at room temperature without musice... :p
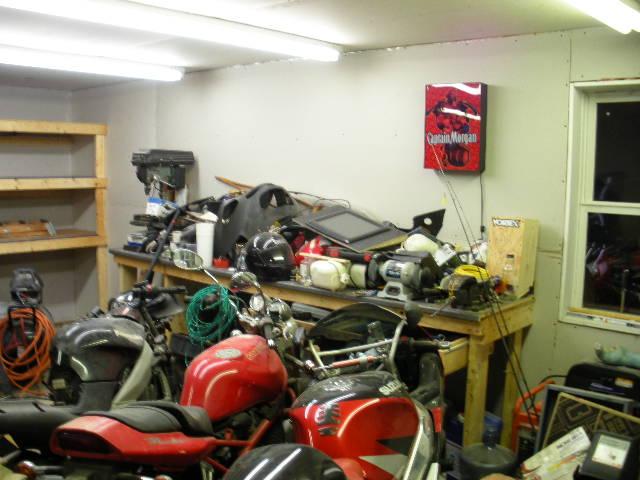
Here's the scene as things progressed.
At this point we decided that no way did we want to lose all the headroom in the back by hanging the heater there. It was time to regroup on where to put it.
Total cost so far: 2800 dollars.
Very Jealous
You should see some of these builds with people that have lots of money. It's insane!!! I just about went into shock seeing the build some guy did, 90' by 160' 2 story with a guest room, gameroom etc... car lift whole nine yards... he gets the build thread done and starts asking everyone for advice on tools, only thing was it was painfully obvious right off that he knew nothing about doing his own work since he was asking things like "other then for blowing off dust are air compressors useful" and "can anyone show me what a torque wrench is for? I bought it cause it was expensive so I figured it must be good for the garage.". I thought he was joking at first, he wasn't.
Well that's a slight improvement, eh?
Nicely done!
wow that is awesome
 Posting Permissions

 Reply With Quote