

0


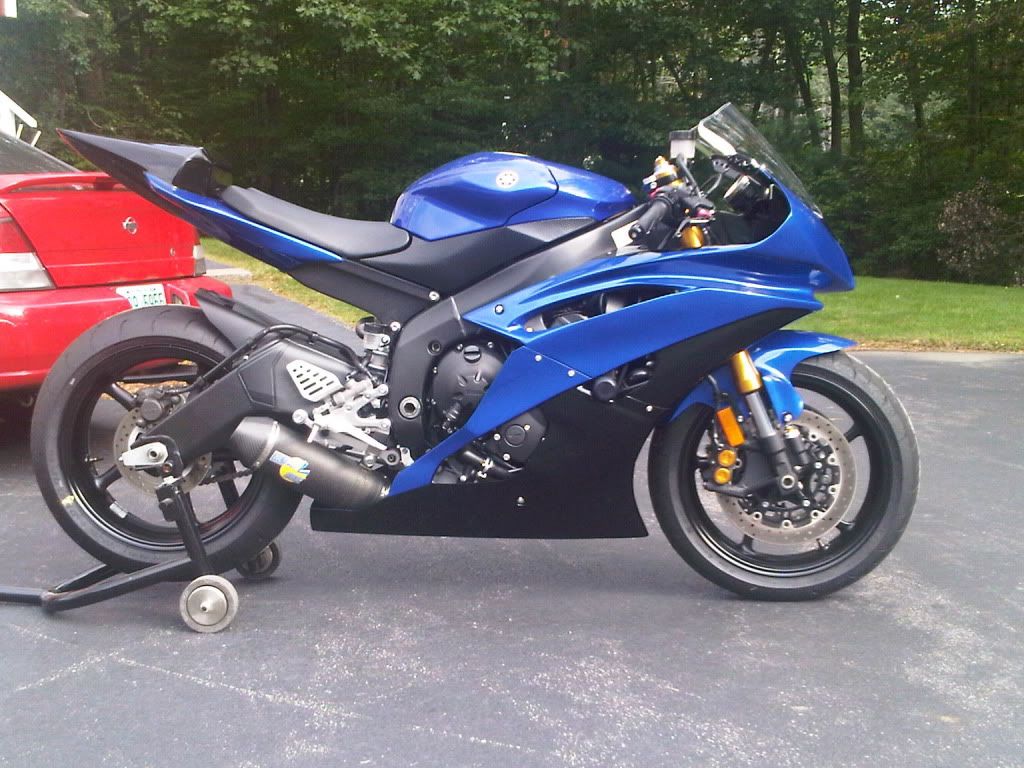
I'm still very new to the track day scene, but I was able to attend a few days last season. I was running the stock plastics last season, just because I wasn't sure if this would be a regular thing for me or not. This season I really didn't want to risk going down on the stock stuff so I purchased a set of Armor Bodies Pro Series Bodywork. Overall, the fit was an 8/10. Everything fit very well, I had to do some slight trimming on the draft pan, but that was it. The lower was really tight, but once it's all secured, it fits well.
The original plan was to almost mimic the stock paint scheme and toss on a 09 Graves replica decal kit. I really just wanted the decals so that I could have the stock graphics and Yamaha emblems that are on the factory plastics. I haven't yet installed them...and at this point, I almost like it the way it is...
I was going to rattle can the plastics but I ended up breaking down and getting a cheap gun and some middle of the road auto paint. This paint is actually from Sherwin Williams. The blue is from a 96 Vette (Dark Cloisonné Blue, same as PPG 4798). The metallic black is some Toyota color found on trucks from 89-present. The clear is their middle of the road product as well.
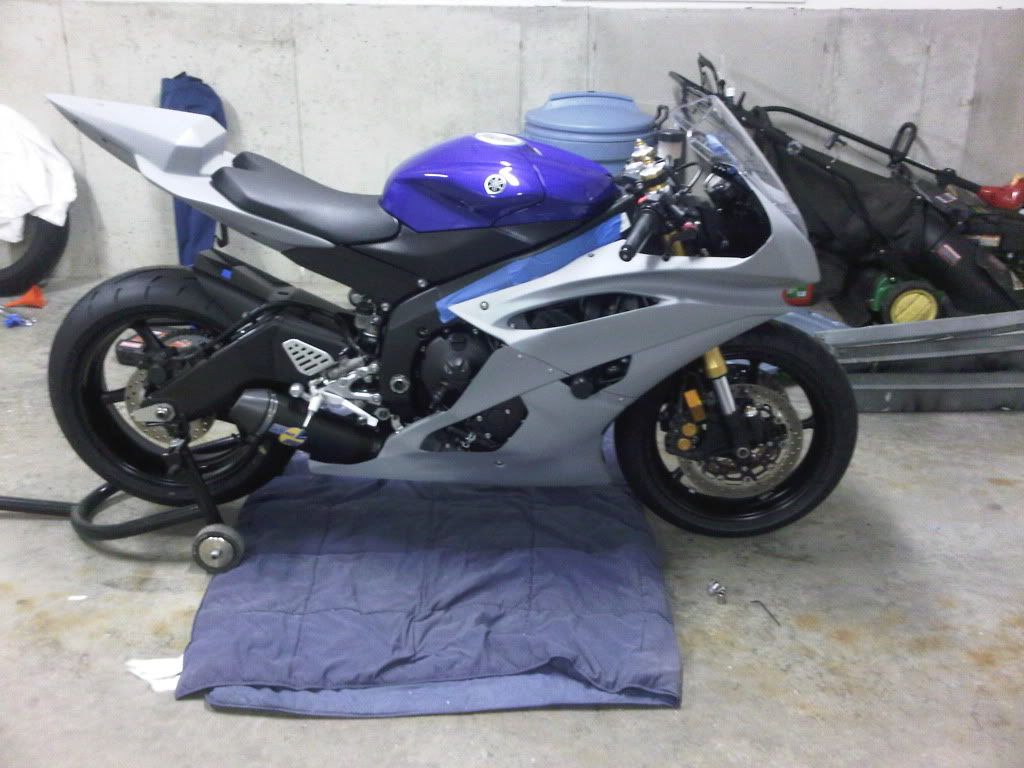
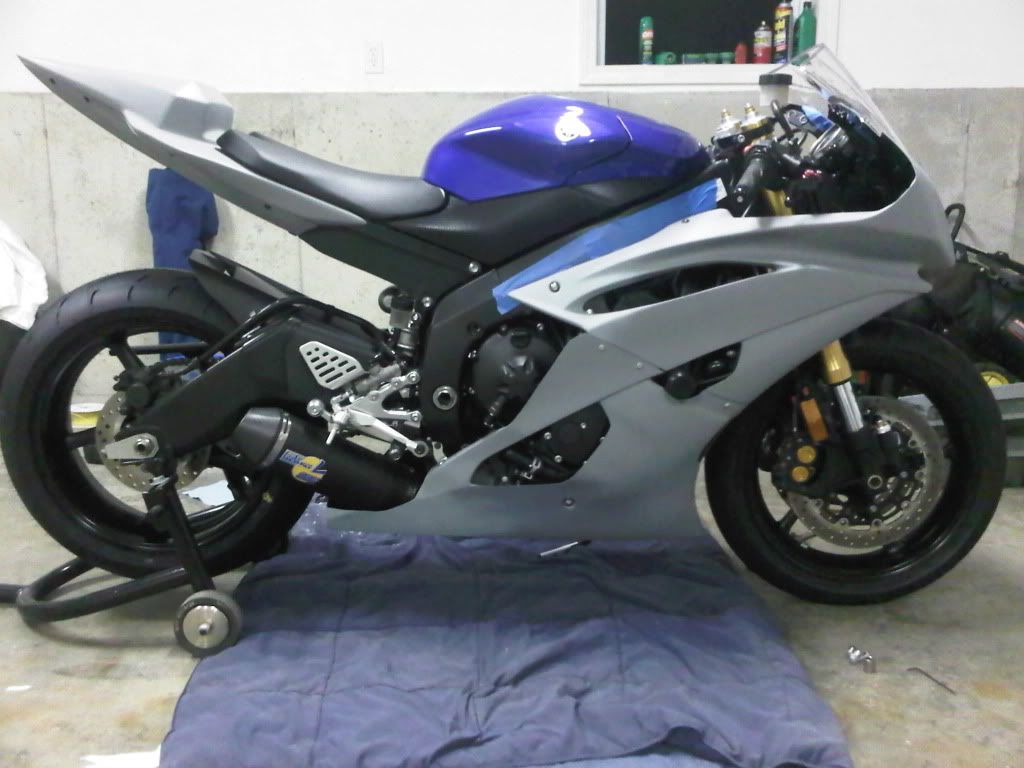
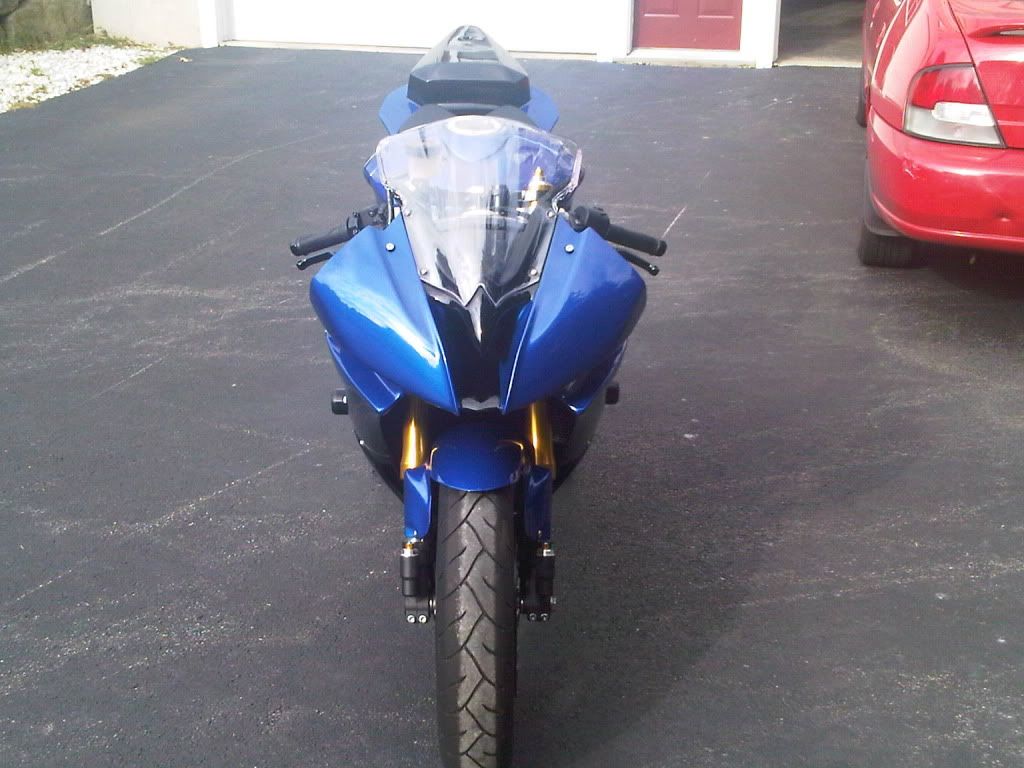
Keep in mind that this is my first time painting anything, and the first set of track bodywork that I fit. The blue is almost a spot-on match. The only thing that wasn't painted was the tank. I used pan-head style Dzus fastenes for the upper/lower and plastic push-pin rivets for the tail to try to keep it looking as stock, and as clean as possible. Pics below..(cell-phone, not the best clarity)
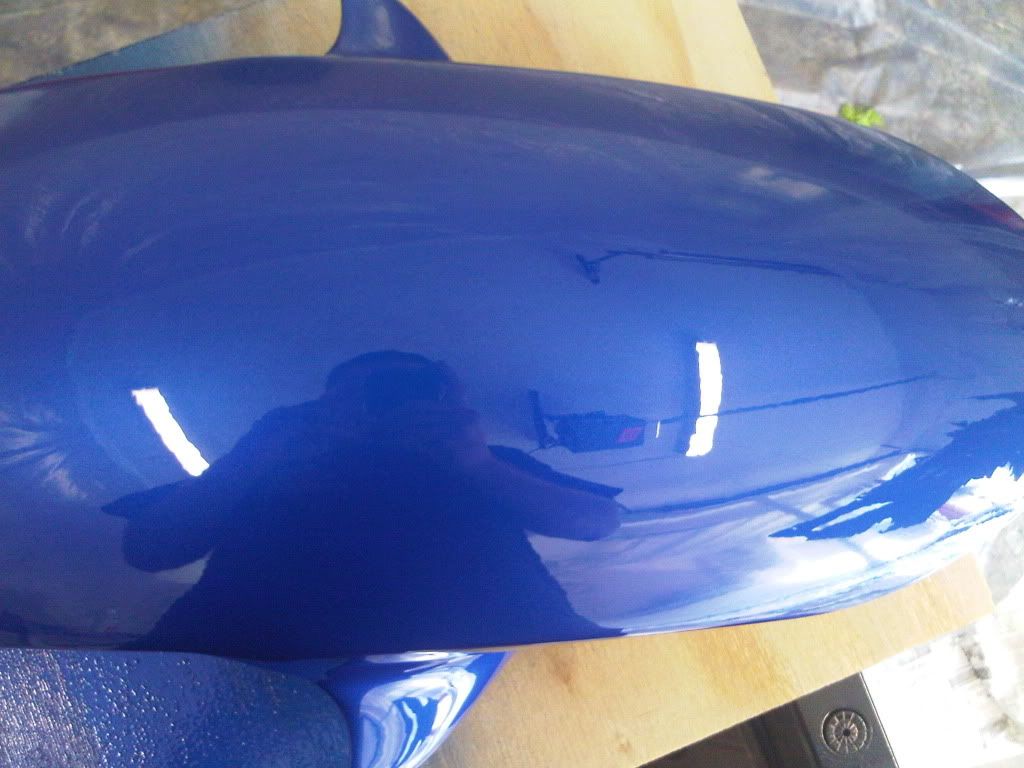
Fit and wet sanded with 600grit:
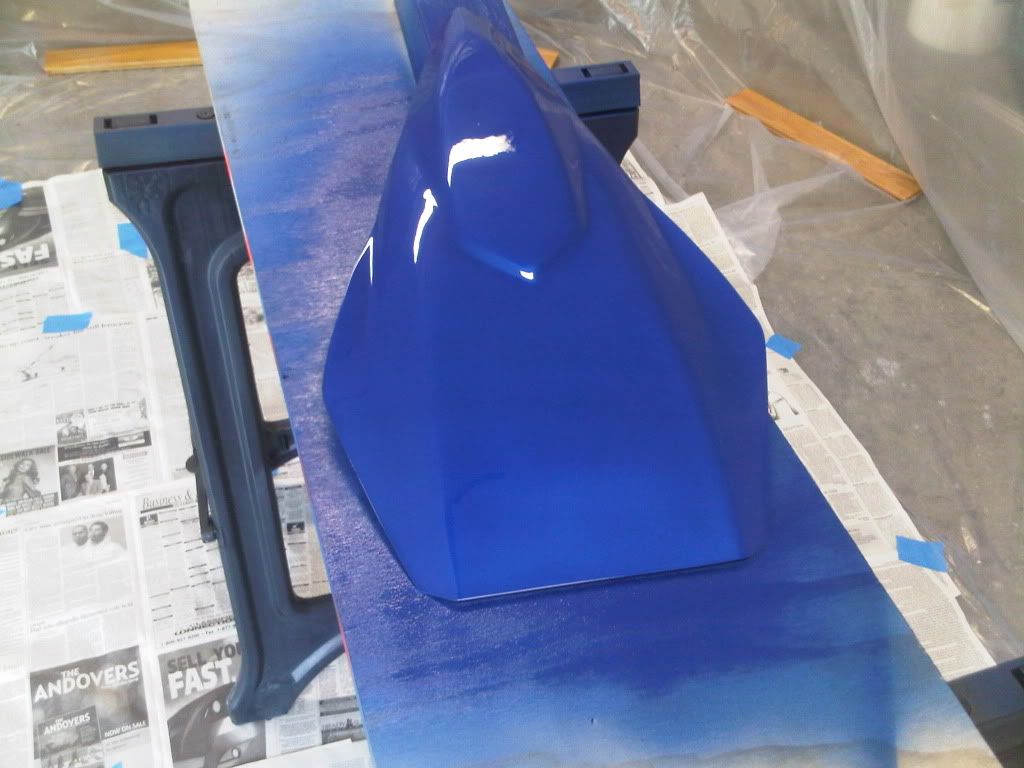
Spray-out test panel on an extra draft pan I had:
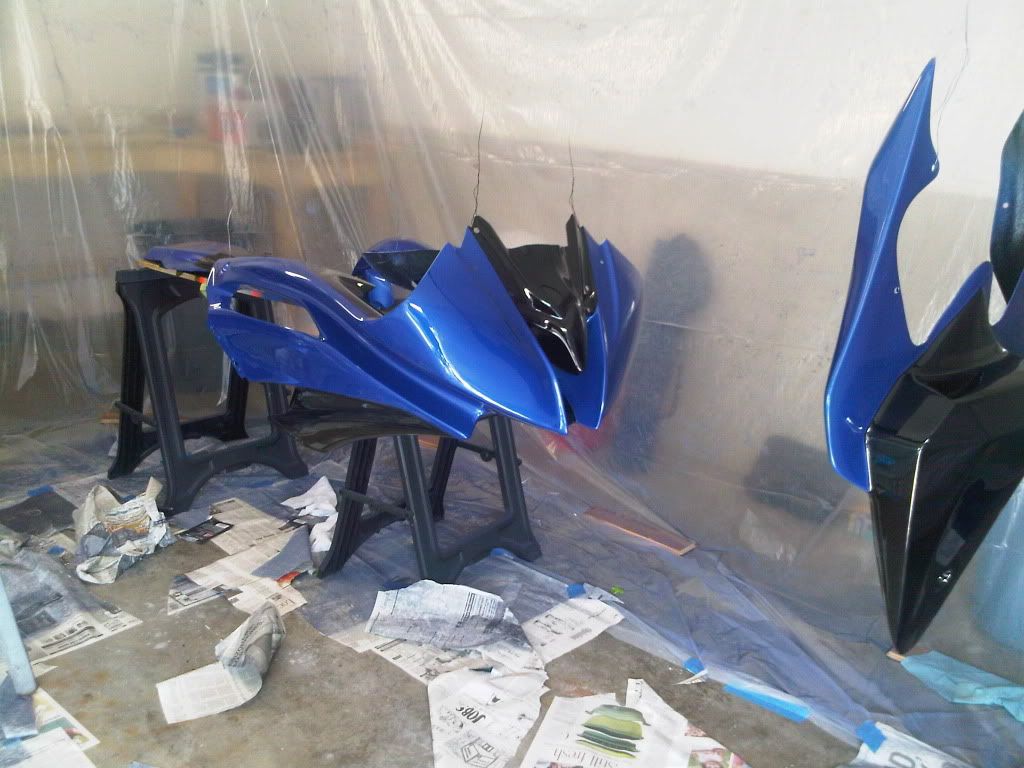
Make-shift booth in the garage:
Final Results, no buffing, pretty much no orange peel anywhere:
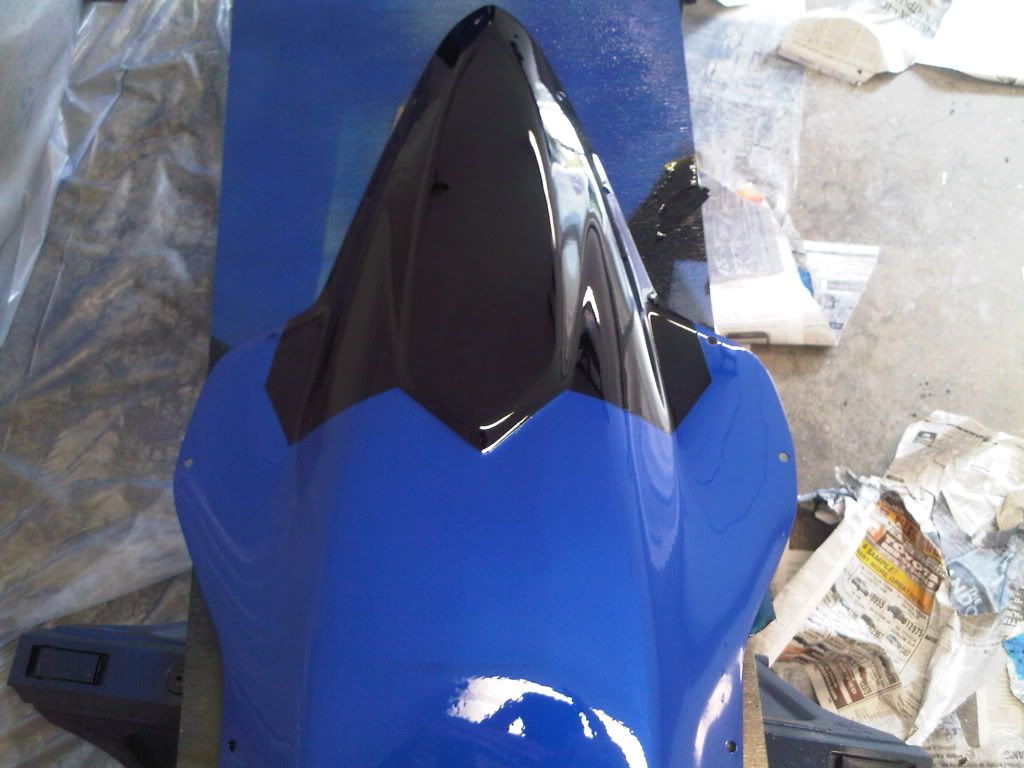
Mimicking the stock paint:
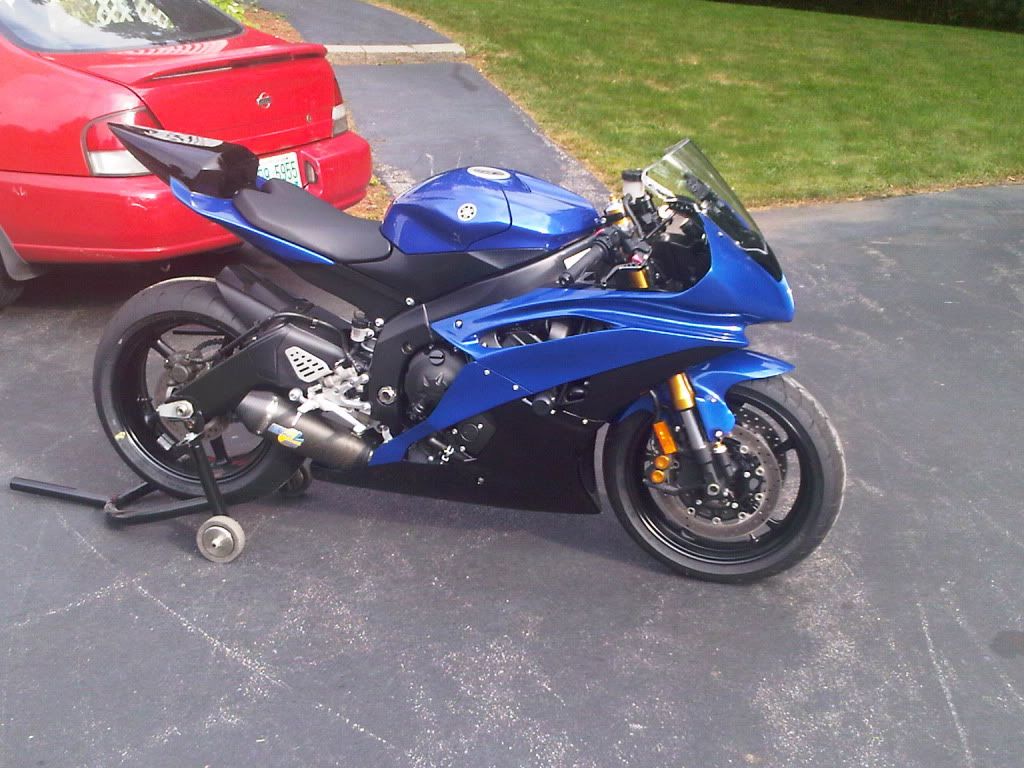
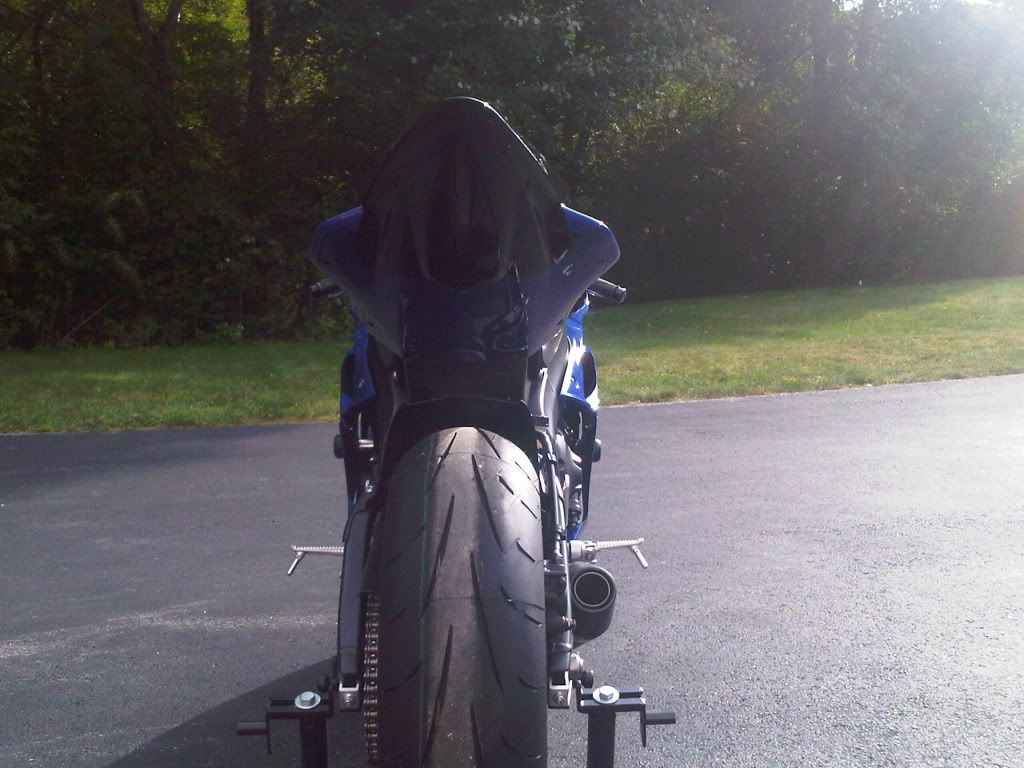
Final Assembly:
Overall I'm pretty excited the way it came out, especially for my first time. Comments and questions welcome! Looking forward to the last two Bomo Days at NHMS!!
.
Jay
2009 R6

Wirelessly posted (Mozilla/5.0 (iPhone; U; CPU iPhone OS 4_0_2 like Mac OS X; en-us) AppleWebKit/532.9 (KHTML, like Gecko) Version/4.0.5 Mobile/8A400 Safari/6531.22.7)
Sweet! Nice job.
Wow man. Nice job. I have a gun but I haven't gotten around to trying it yet.
LRRS 878 Clapped out Gixxah
that looks mega, i always liked the look of the graves bikes. really nice job
Wow that came out awesome!
Wow man. Nice job. I have a gun but I haven't gotten around to trying it yet.
LRRS 878 Clapped out Gixxah
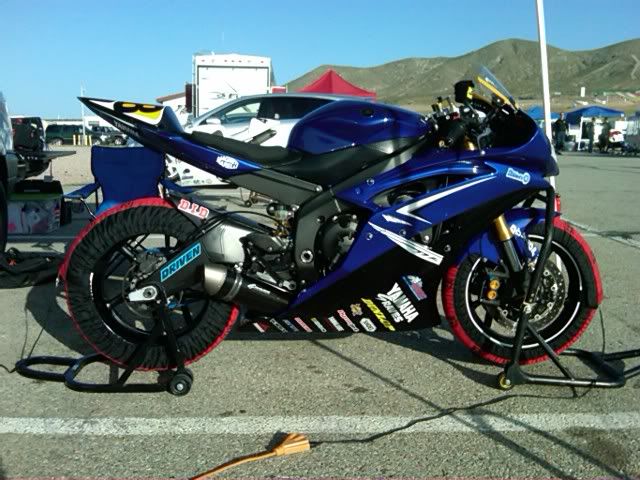
This is the look that I was going for (09 Graves Bike). I don't want to put on all the cheesy sponsor stickers, but I'll prob. toss on the Graves Yamaha and fairing graphics. Opinions?
Jay
2009 R6
Wow man. Nice job. I have a gun but I haven't gotten around to trying it yet.
LRRS 878 Clapped out Gixxah
Nice job! You do realize that nice paint is a magnet for asphalt though? Just ask Brett...
LRRS EX #7
Low Down Racing
- Woodcraft - Armour Bodies - Computrack Boston - Lifeproof -
Looky beautiful. Well done.
Keeping my fingers cross that it won't happen but it's got to be a lot easier on the wallet than going down on the stockers...Originally Posted by Trouble

Jay
2009 R6
if my paint barely touched the ground and was a professional job then I think his diy job might only suffer a tip over in the garage.
looks good.
LRRS Am #331
Graphic Tailor / Woodcraft / Armour Bodies / Suomy / Cycle Performance Autobody / Shorai / ChickenHawk Racing
I wasn't going to tell him.
You did a great job. Got to love doing it right and saving money at the same time.
Looks great
That looks awesome really nice job.
+1 Just tip it over as soon as you get to the pits. Looks killer now though!
Bill Cool --- CRA EX 47, CVMA EX 478 --- 2025 CVMA F40UL Champion, 2023 NEMRR GTO Champion, 2020-21 LRRS LWSS Champion --- RSP Racing / TTD / MTAG-Pirelli / Woodcraft / Sportbike Track Gear / Seacoast Sport Cycle / Bison
Nice job! Very clean/well thought out color combo. The paint looks great for a DIYWhat paint/clear did you use? Spray gun? compressor size? I paint for a living so I'm always curious to see what tools did the job.
Paint and clear came from Sherwin Williams. I was going to go with PPG but the guy at the more-local store was a prick, so I ended up driving further and going with SW. It seemed like OK stuff, but I prob. wouldn't know what sprays good, better or bad at this point...
The base colors were 4th Dimension 5.0 Urethane with DR633 Medium Reducer (Mixed 2:1)
Dark Cloisonné Blue, 96 Corrvette, Sherwin Williams formula: 48412-00
Black Metallic, 86-05 Toyota, Sherwin Williams formula: 35533-00
Clear was Finish-1 FC-720 with FH612 Hardener (mixed 4:1)
I bought:
1 pint of Blue
1 pint of Black
1 quart of reducer
1 quart of clear
1/2-pint of hardener
I had JUST enough color in blue since I used 4oz before mixing on the spray-out panel. I had about 3oz left of the black. Everything was painted except the tank. I had plenty of clear, with about 6-8oz left (unmixed).
If I had to guess this was the volume of paint that I used (mixed)
18oz Blue (mixed 2:1)
20oz Black (mixed 2:1)
30oz Cear (mixed 4:1)
I never realised, but you lose a lot of paint when you spray hanging parts, and obv. some people may be much more efficient than me and use less paint. I ran out of blue JUST as I was spraying the underside of a tab, and thankfully, I had enough for good coverage.
Don't laugh....but I actually used a Harbor Freight, China-special gunI HATE their tools and refuse to buy anything from them, but for this I figured I've give it a shot. To be honest, the gun actually out-performed my abilities as a painter, so I was pretty impressed, with no complaints.
Gun was model # 66222. It has a 1.4mm tip. I sprayed the base colors at 35psi at the regulator and the clear at 55psi.
I didn't shoot any primer, I used what was on the bodywork when I got it. I was told that it was a urethane primer, and I just wetsanded with 600grit to get it smooth and uniform.
Both the base colors got two medium-wet coats, with 15min fash time between both. The sprayout panel got 3 coats of color, but I actually ran out of paint on the real parts so luckly, two was just enough to get good coverage. A 3rd coat would have got the paint a little darker, but it actually matched good this way...
The clear was 2-coats (no more, no less as recommended by the data sheet (Finish-1 brand)). I laid down two medium-wet coats, with 5min flash between coats. It was dust free in about an hour, and fully cured the next morning.
The compressor was just a home-owners 20 gallon, 5HP, 6scfm@40. The gun requires 12scfm@45 and the compressor was hardly up to the task. I knew this was going to be an issue but the saving point was that I wasn't spraying for extended periods. By the time I sprayed one part and repositioned to the next, the compressor had already recharged. I would never attempt using this for a car, but it was managable for the bike parts.
I've got to say that painting and clearing that upper was tough. Just because it's got a lot of edges and its all broken up. I had to move quick in order to get all the edges first and then spray the majority of the clear while it was still wet. It was just difficult to get a nice uniform volume the way its all broken up, and the hanging parts certainly didn't help. If I had to do it again, I'd definately make some more secure stands to hold the upper/tail
Last edited by Fastsc92; 09-06-11 at 06:55 AM.
Jay
2009 R6
Looks pretty darn good for a first timer. You should be proud.
Mentioned it before I could ..
Quickly, just lay it down on its side to release the magnetism!!!!
Gino
HAWK GT Racer Expert #929
2012 CCS LRRS ULSB Champion
2012 CCS LRRS P89 Champion
2008 CCS ULSB National Champion
ECKRACING Bridgestone Street & Competition Woodcraft MOTUL On Track Media Pine Motorparts Vanson Leathers
I've sprayed Sherwin Williams products before. Compared to Glasurit or PPG it's still a very good/affordable product and lays out smooth (as you are well aware of!)
You do really use up a lot more paint when hanging parts, or just trying to paint smaller intricate parts. I used over a quart sprayable of just color on my bike (but my spray gun is a cannon) Blue colors are usually terrible at coverage so you definitely lucked out with having enough.
Harbor Freight tools have their place, and it looks like the gun worked very well. I'm actually surprised that it put out that finish. I'm sure the primer/sealer they used for the bodywork is sufficient enough. What I usually end up doing if fiberglass pieces have a decent finish is just wet sand with 600 as well. If I don't trust the finish I'll spray a wet on wet sealer over the parts before laying down my color. It adds protection and helps to hide any types of imperfections the wet sanding might not have fixed. Also it can be used to seal the unknown substrate from your finicky basecoat so you don't have any weird paint reactions.
It can be tough to paint certain motorcycle parts, but it looks like you did your research and it definitely shows. You should be proud of your work!
Subscribed. This thread is GOLD. And as for a paint magnet? I think that applies a helluva lot more when you're paying for paintwork... this is like, putting some blingy levers on your bike from a cost perspective. Good work.
Last edited by scottieducati; 09-07-11 at 09:46 PM.
CCS/LRRS #83
You've got some natural talent! Looks great.
if you would like someone to get that first crash out of the way for you let me know. I've done it perfectly twice this season.
LRRS Am #331
Graphic Tailor / Woodcraft / Armour Bodies / Suomy / Cycle Performance Autobody / Shorai / ChickenHawk Racing
 Posting Permissions

 Reply With Quote