0


I am looking to get my truck painted and wondering if there are any local shops / franchises folks can share reviews of.
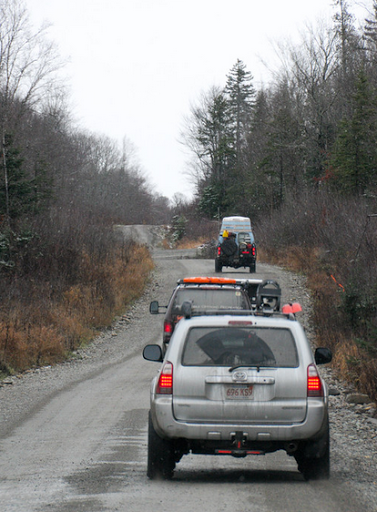
Background: It's a 2008, Silver 4Runner with 99k miles and bodywork is in good shape rust and dents wise (no repairs to metal needed). But after much wheeling/offroading, towing bikes, overlanding and general "use as intended" in our rough winters, the pin stripes and scratches on the paint are starting to get to me. I am looking for a shop to sand down and respray the same factory color, for a general refresh.
I understand the difference between high quality/factory quality paintjob ($5-7k) and a cheaper MAACO-quality paint job ($1500). I have also already gone down the path of "paint correction" and other detailing fixes and the scratches underneath the clear coat always come back. I have made the decision to get the cheaper/$1500 paintjob, knowing fully well it's only a 3-4 year solution. Chances are slim I'll still have the truck in 3 years, and even if I do, I would have no problems spending another $2k then for a refresh.
So I am not looking for comments or thoughts on the quality of paint I need to get. Just looking for any reviews or experiences folks have had with independent paint shops or MAACO franchises in the Boston area, for a cheaper/inexpensive paint job. Much appreciated,
Last edited by xxaarraa; 02-02-15 at 12:49 PM.


Are you absolutely certain wet sanding wouldn't take care of most, if not all, of that?
There is no such thing as "scratches underneath the clear coat". The damage is either on the surface of the clear (which is only solved by wet sanding) or it's past the clear and into the paint (which a wet sand and an application of clear will solve). If the scratches are into the paint, which likely means down to the metal, that's about the only real need to repaint.
I realize you're not asking for anything I just posted but, unless your clear is actually gouged, it sounds like nothing more than a day of wet sanding and waxing would take care of you.
Mikes Autobody in Malden. They are the goto place for the Porsche/Audi club members...quality work for sure.
I'm not a painter but I've done a ton of reading trying to prepare for painting the El Camino.
I would think the guys at Maaco could lay down paint as well as anyone. Where they fall short is the quality of the materials and the quality & quantity of the prep work. They make their money by doing a lot of jobs and doing them cheap. They are going to spend less time masking, removing trim etc. and they are going to use cheaper materials.
We use Inline in Peabody for personal and work vehickes.
Inline Autobody - Peabody, MA | Yelp
It's 2 minutes for any capable adult.
Thanks for the suggestion on wet sanding. Since I am mentally prepared to paint the whole car anyway, it won't hurt to try wet sanding first. I will research this, but high level - is this something I can tackle myself or is this something best handled by a paint shop? If I can do it myself, how do I re-clear after wet sanding? If done by paint shop, what do I ask them for - just explain the situation and what I am looking for?Originally Posted by butcher bergs

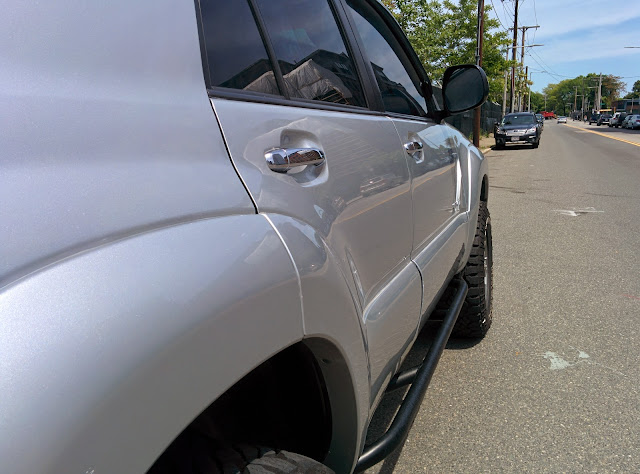
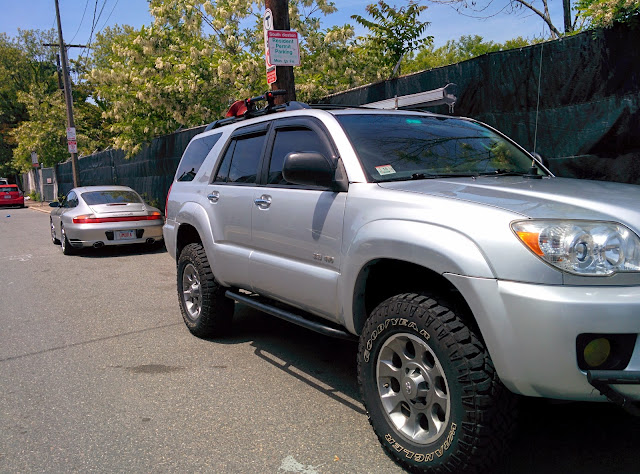
Here are pics of the car the last time I did a 3 stage last June - claybar, polish and wax. Just sharing to show you the general condition - it only looks good for 3 days and scratches reappear.
BTW, this is usually what causes the heartburn every fall / winter:
Thanks #9, didn't know you had an el camino project! It must be an Australian thing, this love of the 'ute' haha. Just import a Maloo and be done with it, instead of messing around with el caminos.
I have heard the same about MAACO. A friend of mine used them to get his old pickup truck painted last year and he said the overall quality seemed acceptable, but there was overspray everywhere - wheel wells, mirrors, roof rack etc. I am prepared to do a lot of the prep work and taping myself before handing the truck to them, if I went the MAACO route.
Last edited by xxaarraa; 02-02-15 at 05:18 AM.
Wet sanding just takes time and is best performed indoors and if you are patient then yes you are able to do it.
No need to spray clear since what you are actually doing is scuffing the surface of the clear with an extremely fine grit.....think along the lines of starting with 1000 grit and ending up at 6000 grit....then polishing in steps with continually finer grit until you are ready for wax.
Obviously sounds easy in 3 sentences but its more about time and patience.
Clay bars and all that auto detail stuff will never get you there.
Alright Butcher, you have convinced me to try this first before paint. I watched a bunch of youtube videos and will probably pickup a pro "scratch removal kit" that comes with the fine grit wet sanding paper, polish, glaze and sealant, just so I don't have to assemble all the items myself. I'll give this a shot and report back.
Question for you though - in all the videos, wet sanding actually seems to remove the clear, you can see the paint underneath being scuffed. I imagine that is actually how the scratch is removed - the paint itself underneath the clear is 'blended' What I am confused about is how polishing and waxing then restores the clear? I would imagine that if you sand down the clear coat, you have to add clear coat back by spraying it on - how does polishing help you get around that?
Last edited by xxaarraa; 02-02-15 at 12:51 PM.

I've wet sanded and buffed a few vehicles in the past. It's likely there isn't enough clear coat on factory/original paint to actually wet sand, and buff to a shine again without showing burn spots. My guess is if buffing compound won't remove the scratches, you'll end up wetsanding and reclear the car. If you do try though, you won't get far with 1000 grit, I used to start with 600 to cut it, 1000 to smooth it, and buffing compound to remove the 1000 grit scratches and bring out the shine
Yamaha
I know you mentioned paiting but what about a vinyal wrap? They can usually be done for around the price you're talking about
2007 Kawasaki zx6r
Good tip on grade of sandpaper to use, thanks. 600 sounds pretty coarse, I thought wet sanding was done with much much finer sandpaper, like in the thousands? Another reason I favor buying a pro kit that should in theory come with all the grades needed?
As stated, wet sand and new clear will be your best bang for the buck. If your paint isn't faded, you just need a new top layer.
No need to remove the clear down to the paint for this hence my suggestion to start with something in the neighborhood of 1000 grit and from there. No machines, all hand work for this type of damage, completing one panel at a time.
I'm not sure which videos you refer to but I'll go out on a limb and say they aren't quite getting into the paint in at least some of them.
For the damage you describe, OP, all you essentially end up doing with finer grit wet sanding is scrubbing to the depth of the microscopic abrasions in the clear then repolishing the clear. Yes, there is a very light removal of clear during this process but there should be no need to get into the paint if the damage is indeed as described.
Think of it as similar to the headlight restore kits but on a much finer level with far less removal of material.
Alright Butcher, I took your advice and dove in on this whole wet sanding experiment. I bought a 4 stage kit that came with sand paper (3000 grit maybe?), sanding sponge, spot cleaner, scratch remover, glaze and sealant. I am sure I could have pieced it all together instead of paying for a "kit" but I wanted it all in one place to start with.
I am doing this door panel by door panel, and it's taking me about 2 hours per door. I have never done any wet sanding before, so I didn't have the courage to break out the orbital buffer. Doing this all by hand. Here are the steps I am following:
Clean
Claybar
Use the "spot cleaner" supplied in the kit
Mark off all the scratches with painter's tape
Wet sand with the supplied solution
Polish
Seal
Incidentally, the plastic rocker panels and fender flares seem to respond better to this method than the metal doors. I assume the factory paint on the rocker panels has a flex agent in it that makes it more responsive to scratch removal?
So far the results are encouraging. However, I have been down this road twice before (never as far as wet sanding), and it looks great for a few days and then all the scratches reappear. So I am going to give it a week, drive around and see what happens before I invest the time to do the other side of the truck.
Thanks for your tips on this Butcher. I am not sure it works just yet, but I will keep you posted.

Last edited by xxaarraa; 04-26-15 at 05:58 PM.
C'mon really?!! Then you're gonna go take it offroading again? You're a good man! Lolrof
[SIGPIhttp://www.nestreetriders.com/forum/signaturepics/sigpic8737_4.gifC][/SIGPIC]
How are the results?
The results are great Butcher. I should say were great, I have hit a major snag.
On one side, I was using the sanding block that came with the kit. It must be something like 2000+ grit. I went through both the strips they sent, so I picked up 1000 grit because someone suggested it above and started doing the other side.
Turns out 1000 grit is very coarse. The door panel will not take any polish.
So I bought 2000 grit, sanded over the areas where i used 1000 grit and redid the polish and glaze.
Results are better, but I still see a lot of 'ghosting'
I am debating between trying 3000 grit and redoing the polish and glaze, or just taking an orbital and trying to polish again (I have been doing everything by hand so far).
Regardless, overall, the results are great. Especially in the case of a 7 year old car which has lived a hard life.
Last edited by xxaarraa; 05-06-15 at 10:36 AM.
I was the one who suggested possibly starting with 1000 as I wasn't sure the extent of the damage we were talking about. I knew it wasnt as conservative as my gut told me and I apologize for misleading you. Just be careful at this point since you are still taking clear coat off with every scrub.
Personally I would keep the orbital buffer on the shelf if you have been pleased with the results so far. Be as patient as you have been and the results will stay consistent.
The key is to remove enough clear to level the scratches, which you likely have achieved, however, as you now know, the jump from 1000 to 3000 is significant. You must step down to 3000
No issues at all man. This is a learning process for me, and as someone prepared to get it all painted, I am not stressing out too much if this doesn't work.
I have to say, it's working well so far. As for where I am at with that door panel, do you suggest I do another gentle rub with 3000 and then polish? Or try another round of polishing as is (1000 + 2000 so far), but with an orbital buffer instead of hand? How does one know when you are done sanding?
Also, as a backup / Plab B in case I ended up taking off too much clear, I picked up some Rustoleum high gloss clear coat spray. I can easily drop that door, lay it flat, hit it with a coat of clear, then resand with 3000 grit and polish up.
Here are photos of the other side that I am VERY happy with.

Last edited by xxaarraa; 05-06-15 at 10:37 AM.
I'd stay consistent with what you're doing. Keep that buffer on the shelf.
So do another round of sanding with 3000 then? Then polish again?
Sent you my number.
Bergs I think I staged a major recovery. Like we talked about on the phone, I did 2000, 3000, 4000 and 5000. It's 90% of the way there. From some angles I can still see the scratches from the 1000 grit but that's mostly because I know they are there. My gf says she can't see them even when I point it out.
Done with this door and only sticking to 2000+ grit from now for the remaining doors. Thanks for setting me down this path and for talking me through it. I learned a lot from this project.
This is awesome. I have a 2003 in the same color that needs this same love.
LRRS 878 Clapped out Gixxah
 Posting Permissions

 Reply With Quote